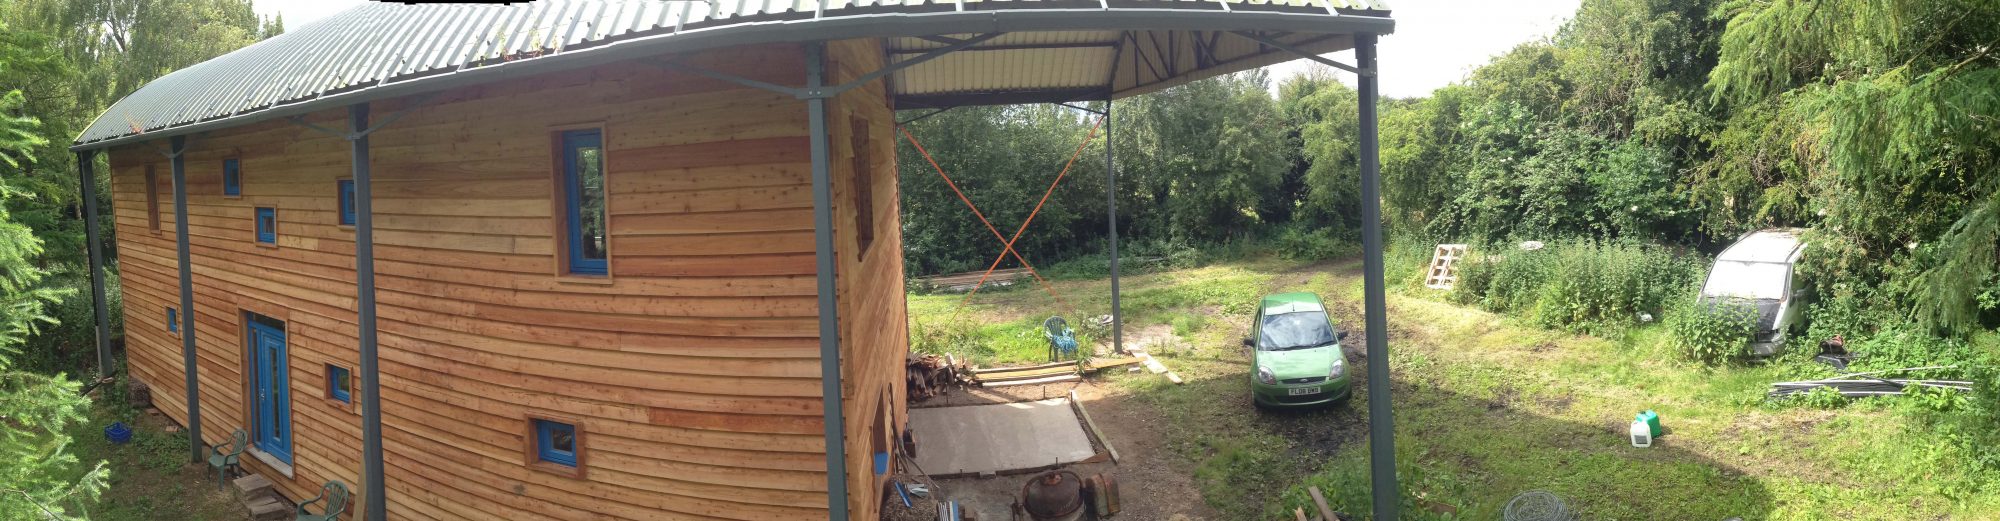
Since I last wrote, the Duffin’s boys have finished their stuff and left us with a smashing set of initially rather lonely looking brick walls, awaiting the warm embrace of straw.

So, after a frantic Easter holiday weekend of getting ready, finishing off the woodwork for the ground floor doors and windows, we welcomed the wonderful, unflappable Emma Appleton, from Straw works to run two week-long straw-bale building courses. Over the ensuing two weeks, a selection of new and not so new straw-bale builders visited the farm and added their labour and enthusiasm to our house.
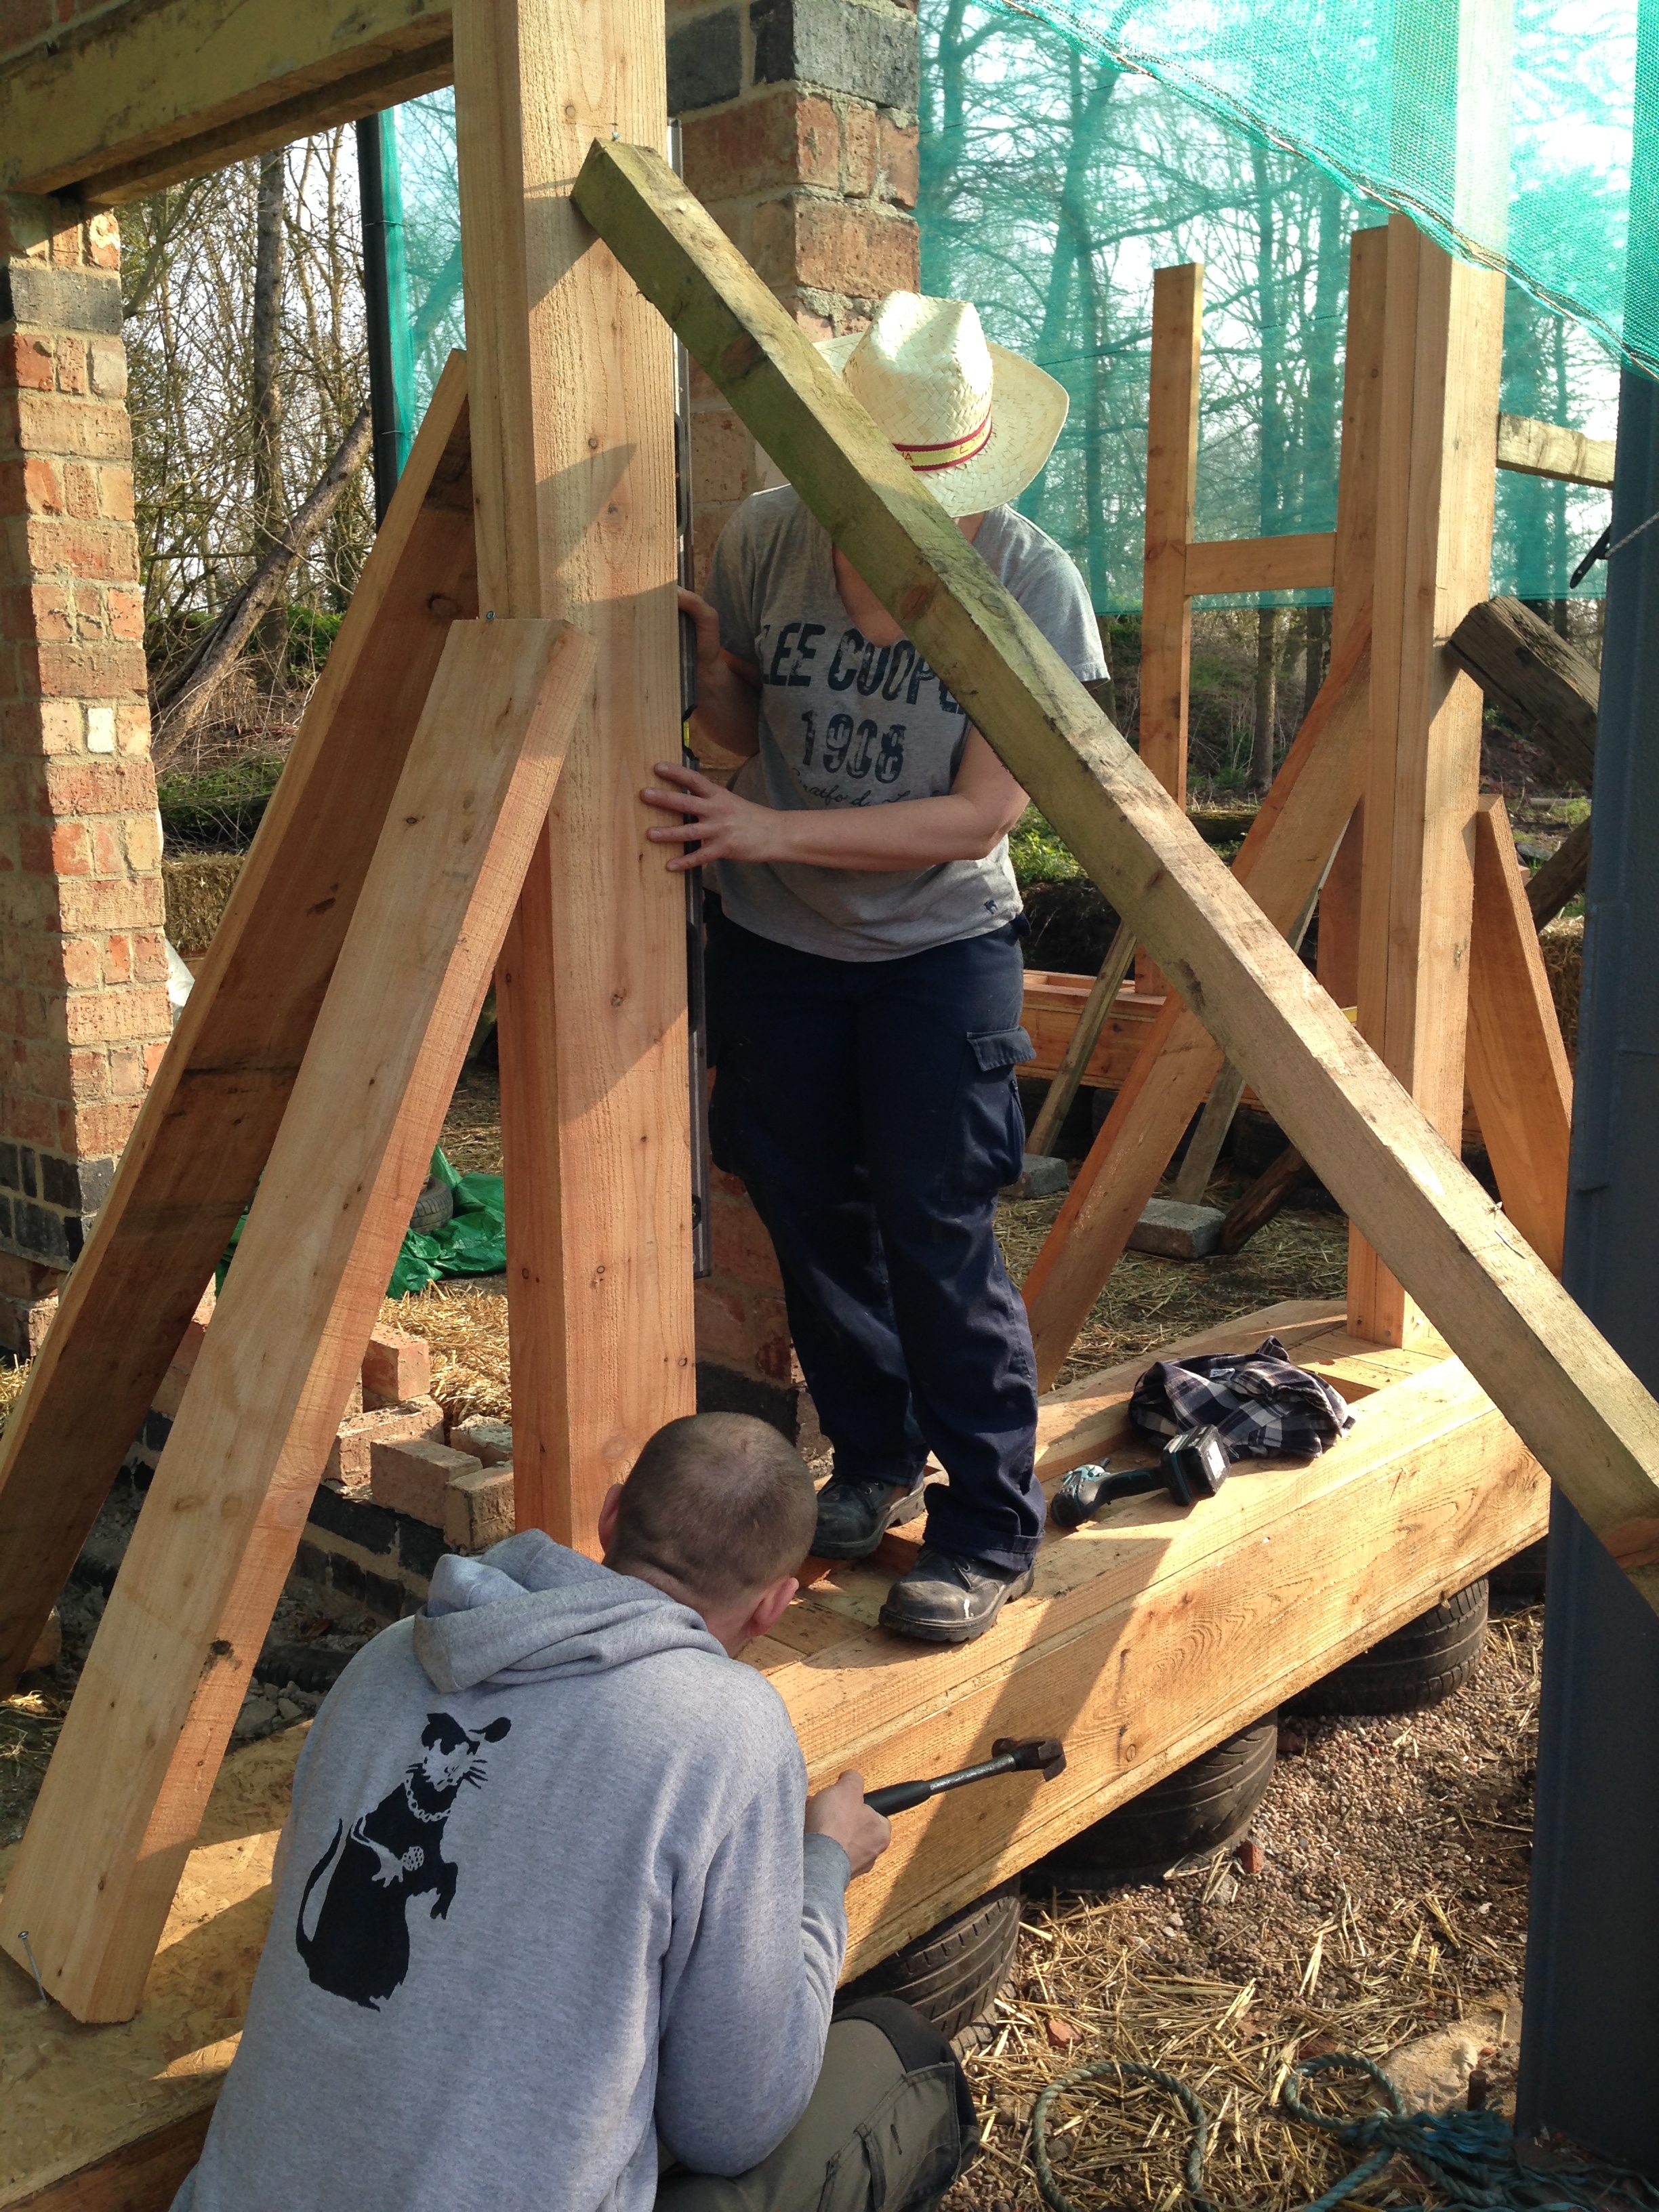
First, we installed the window posts (form the jambs once in place), and braced them so that they remained vertical and parallel until the bales and wall plates were in place.


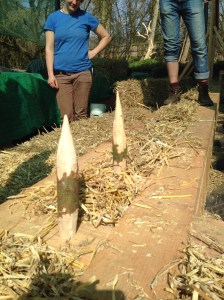
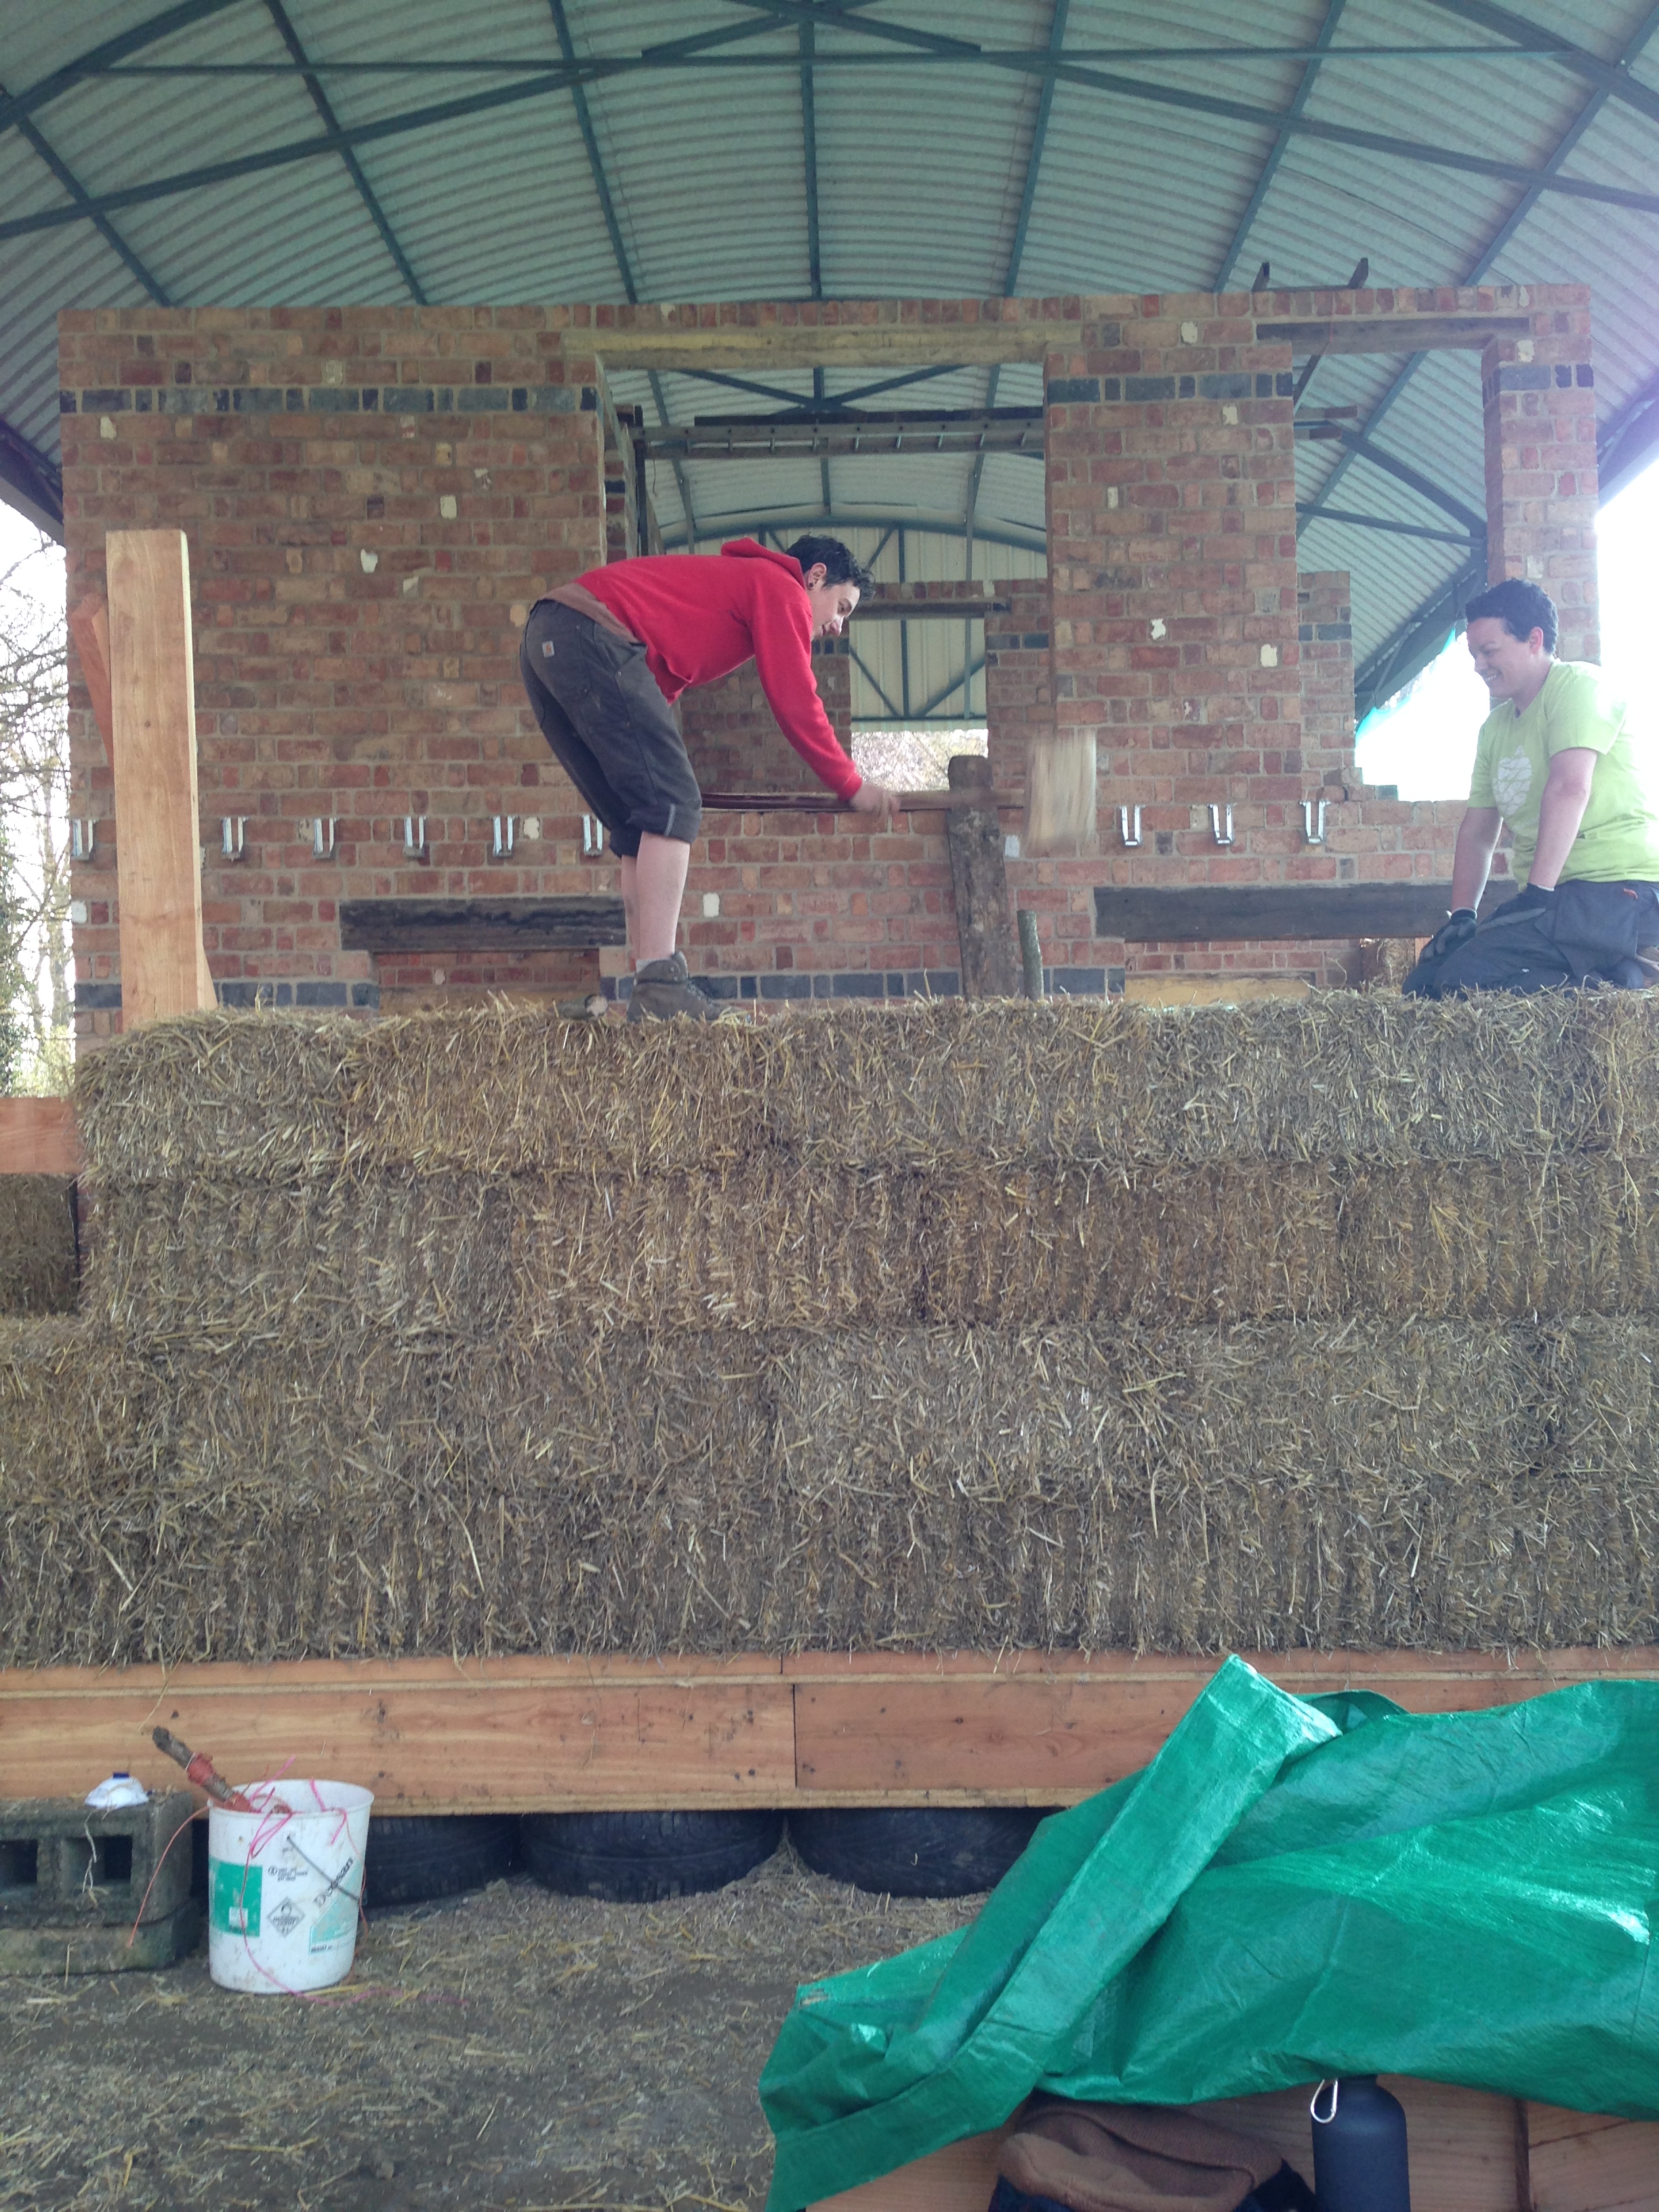
While some of us did this, others began to measure and size bales to fit along the walls, and to prepare the hazel stubs upon which they would be impaled.


Once measured and sized all around the walls for the first course, the first bale was ceremonially laid onto the stubs, and squashed down by Rose!

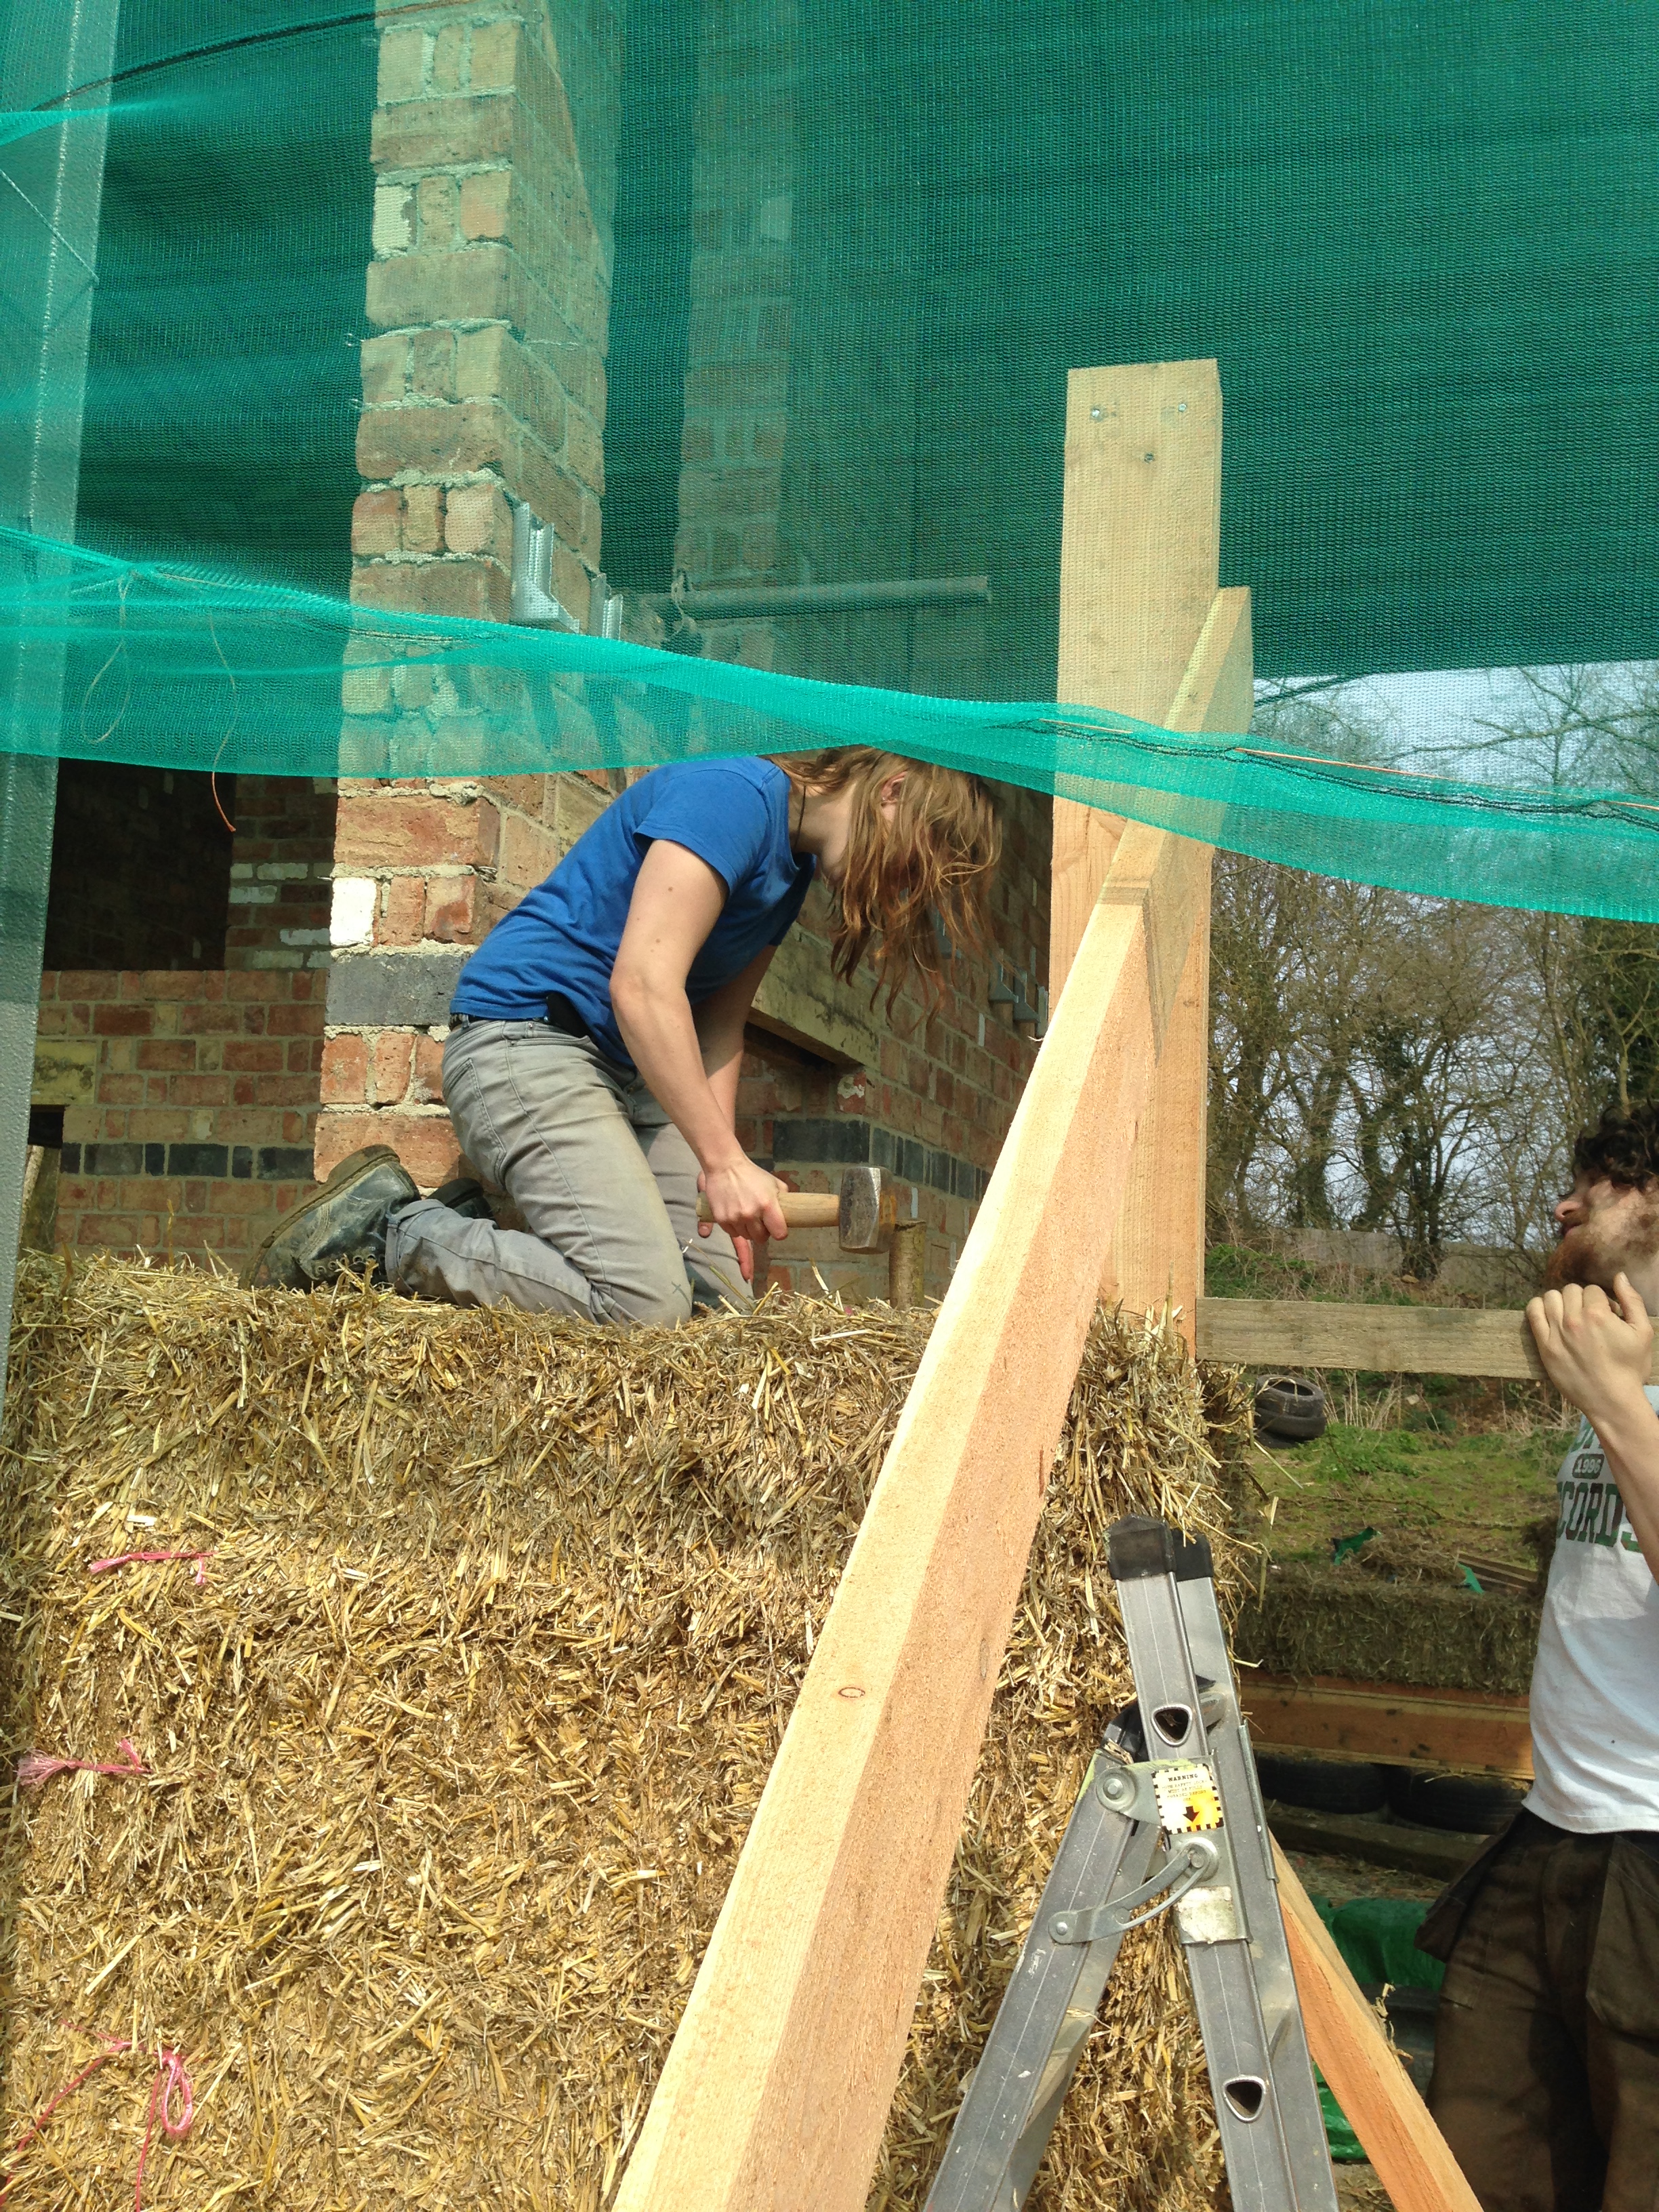
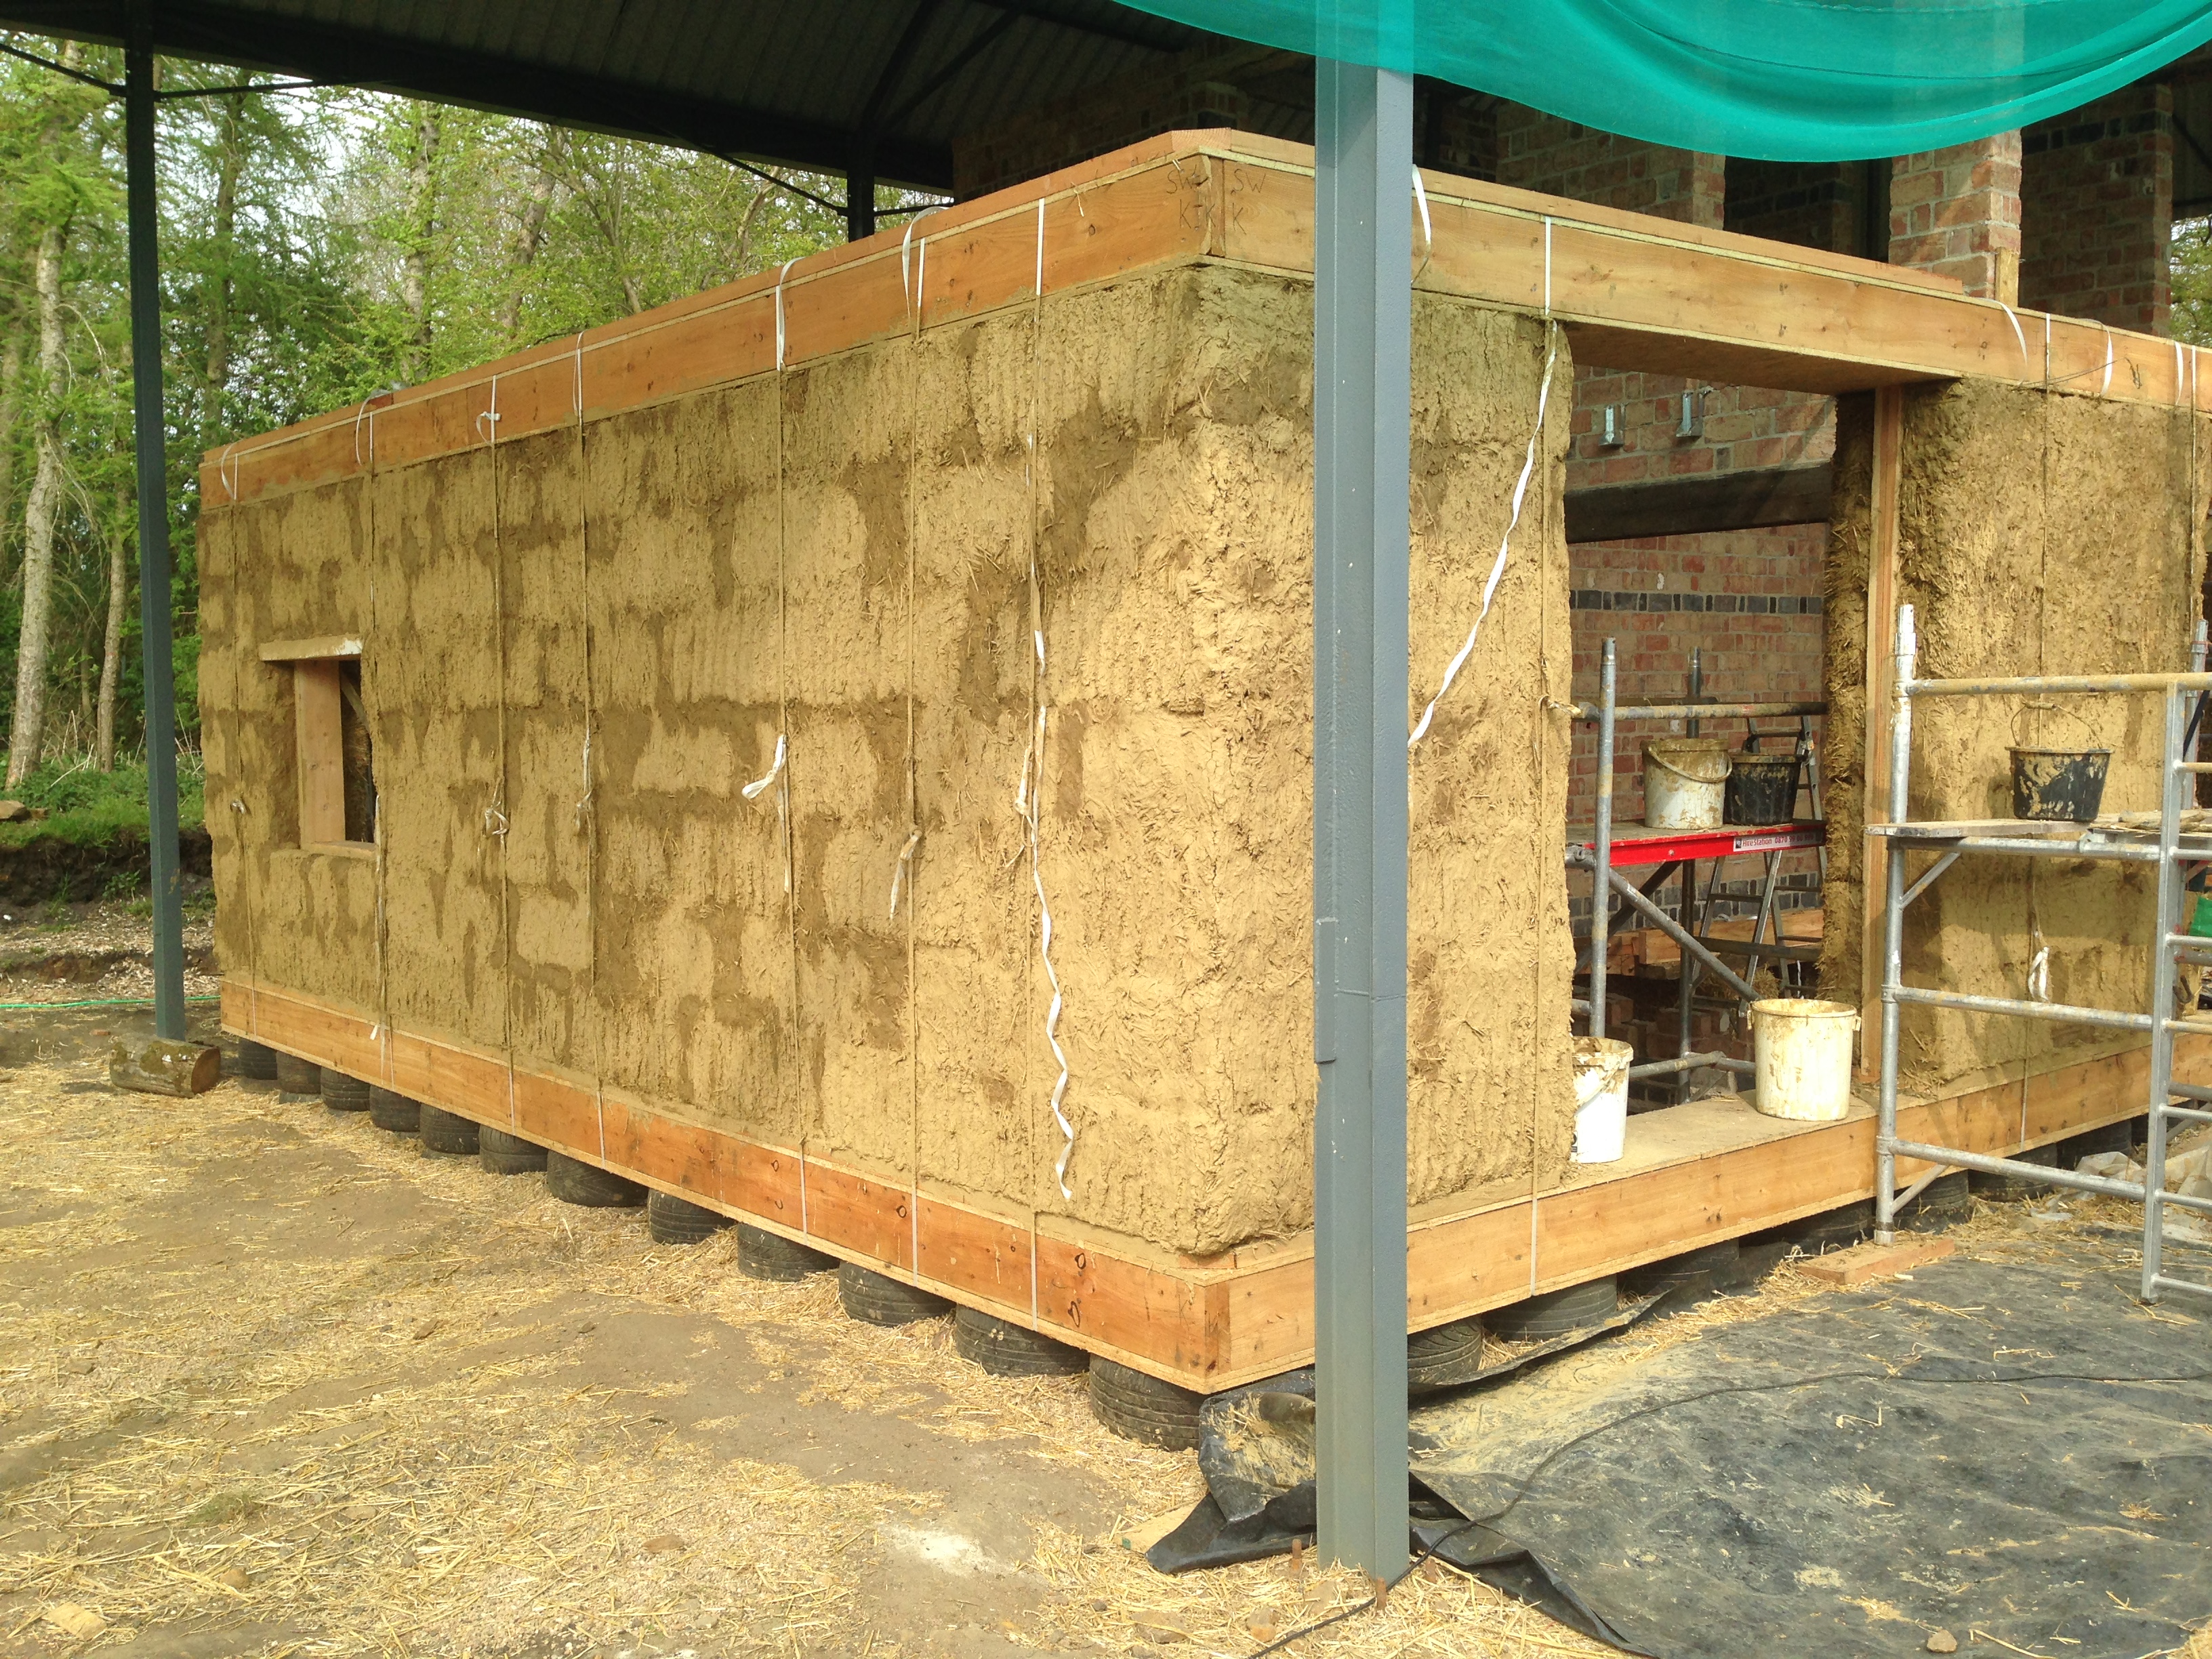
After this, the next 7 courses of bales were cut, sized, staked and laid in preparation for the placing of the wall plate sections. We had built these earlier, in sections, using the base-plate as a bench and template. These were lifted into place by Chris’s simple but effective conversion of the fork-lift on the tractor. The wall-plate sections were then raised sequentially, and manoeuvred by hand into place on the top of the bales, so that they fitted over the window posts.


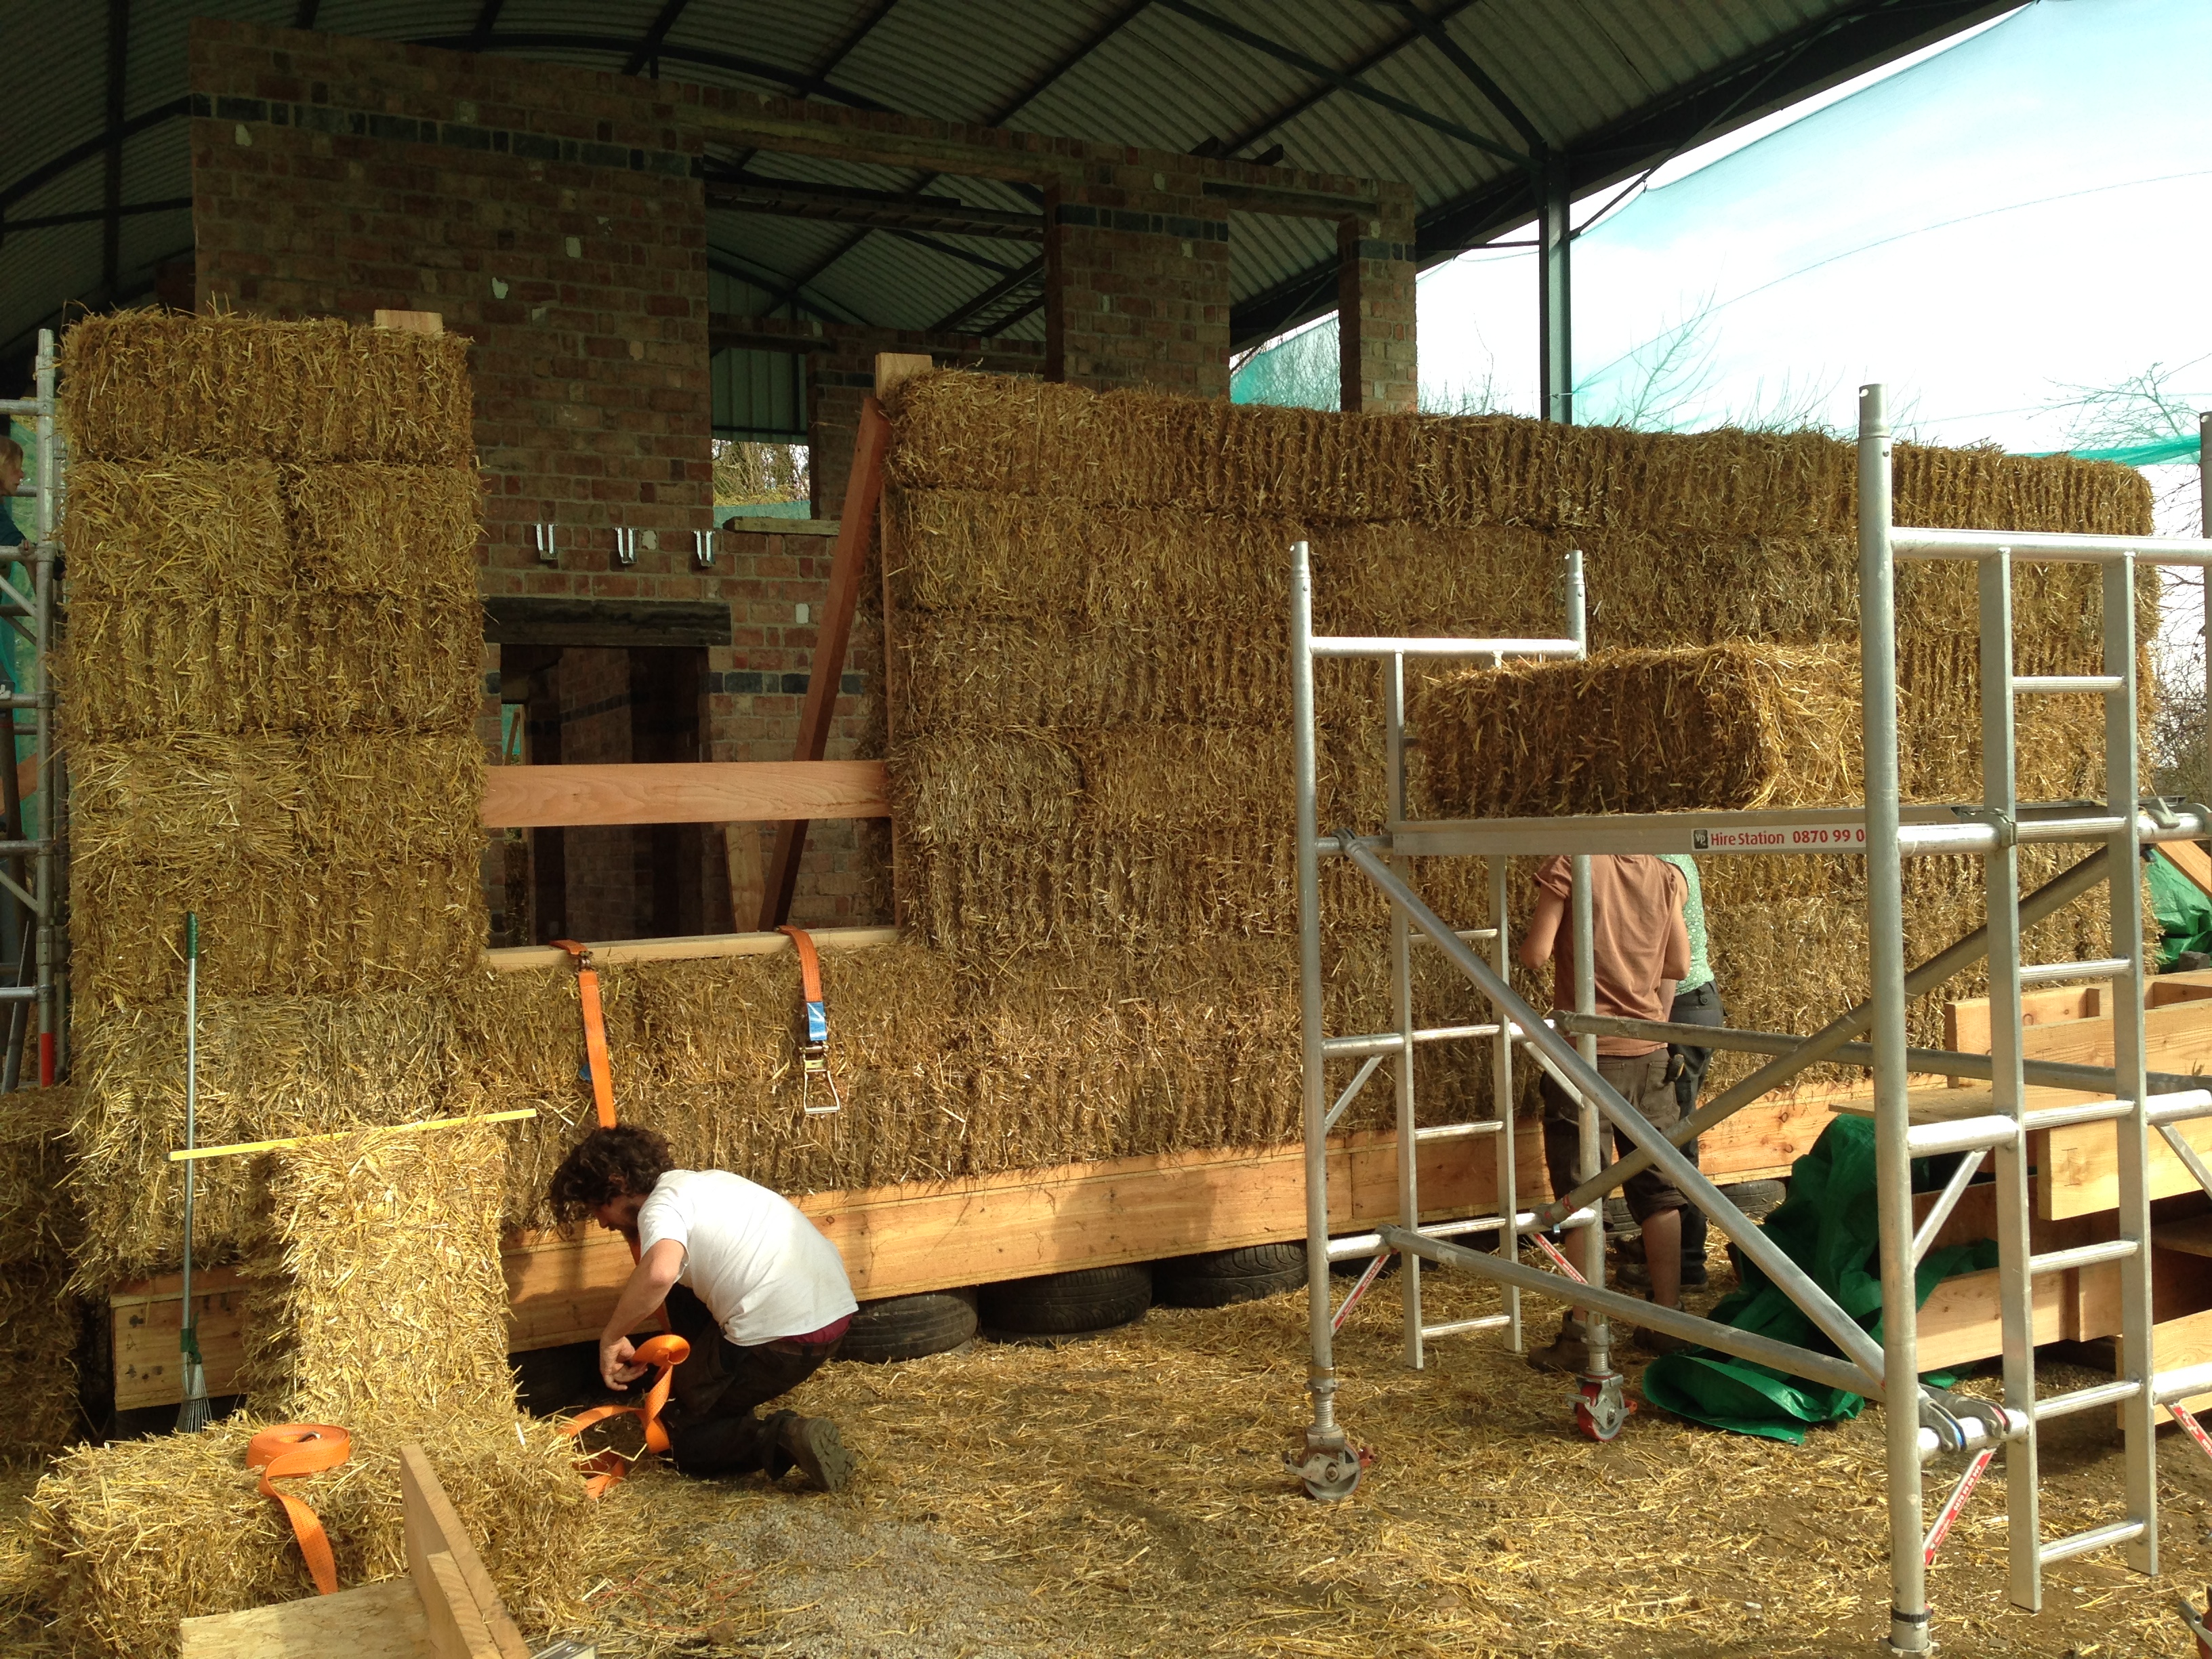


Once the wall plate sections were jiggled into place, and joined together, we then prepared to compress the wall to give it its final strength. We place haulier’s ratchet straps at intervals along a section of wall, passing under the base plate and over the wall plate. These were gradually and sequentially tightened to apply an even force down through the wall. Once we couldn’t apply any more force, we checked the levels, then put in polythene packing straps alongside the ratchet straps. These were tightened to keep the compression when the ratchet straps were released and transferred to another section of wall. In this way we compressed all the walls.

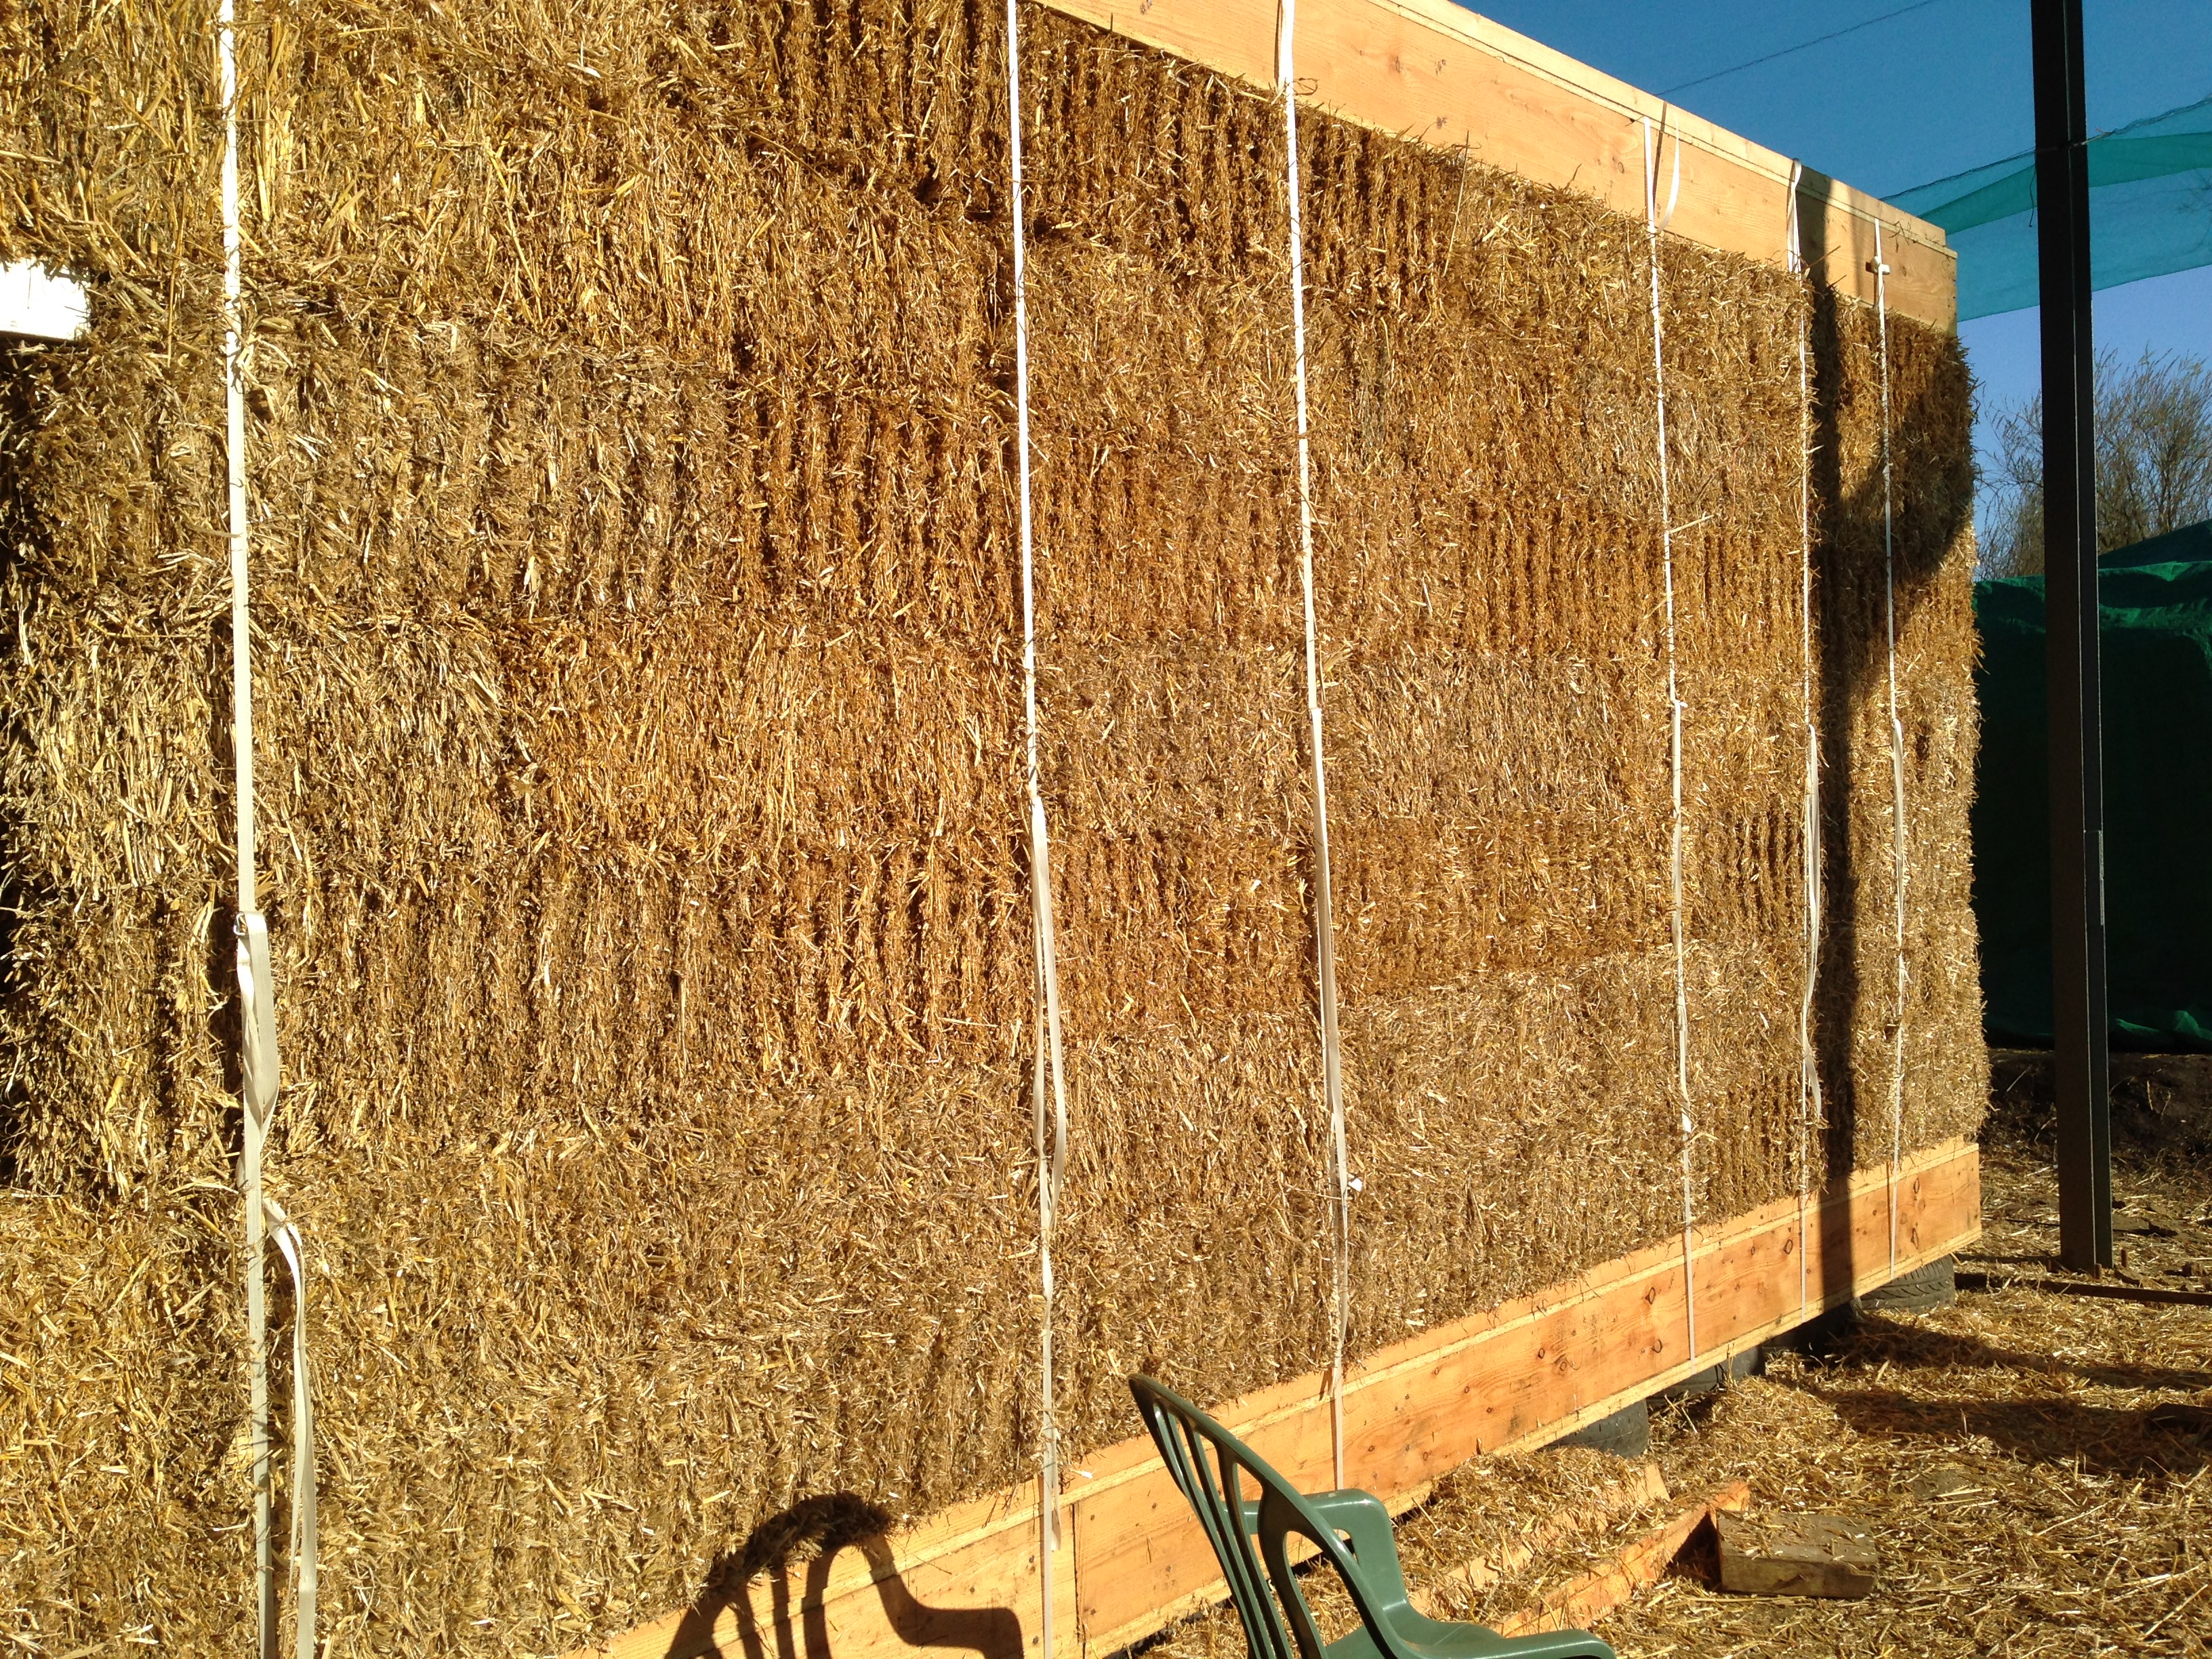

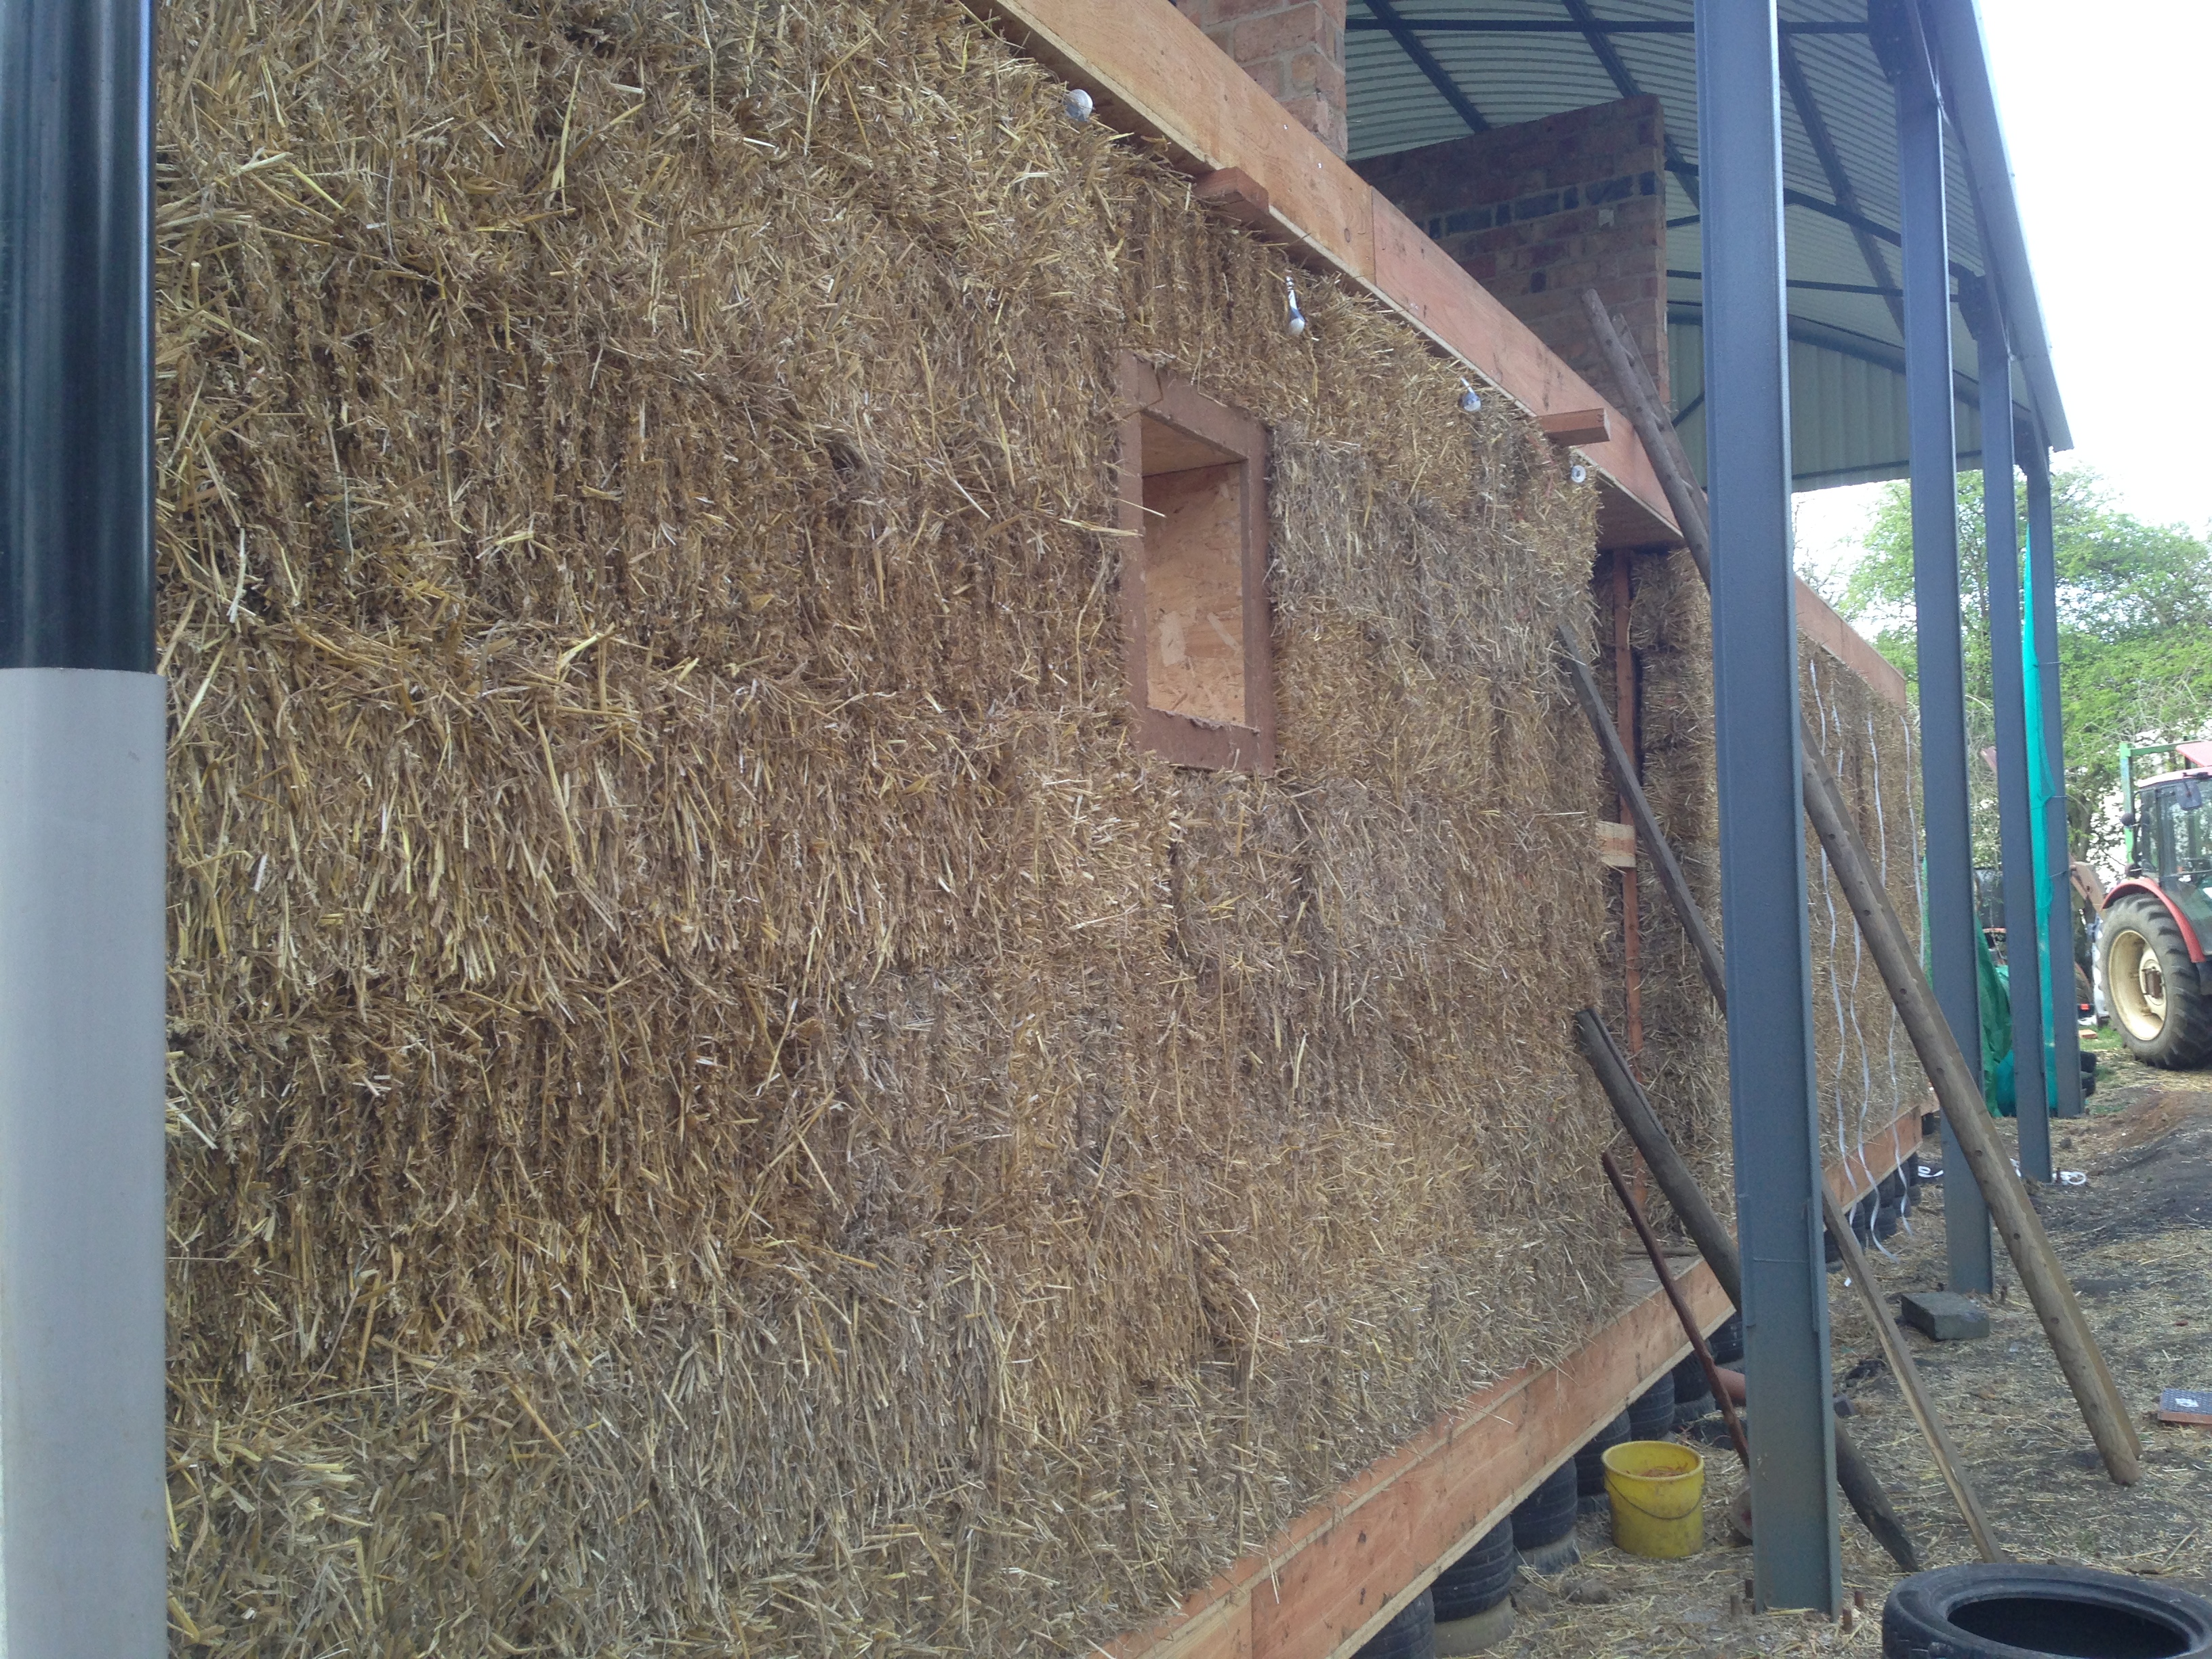
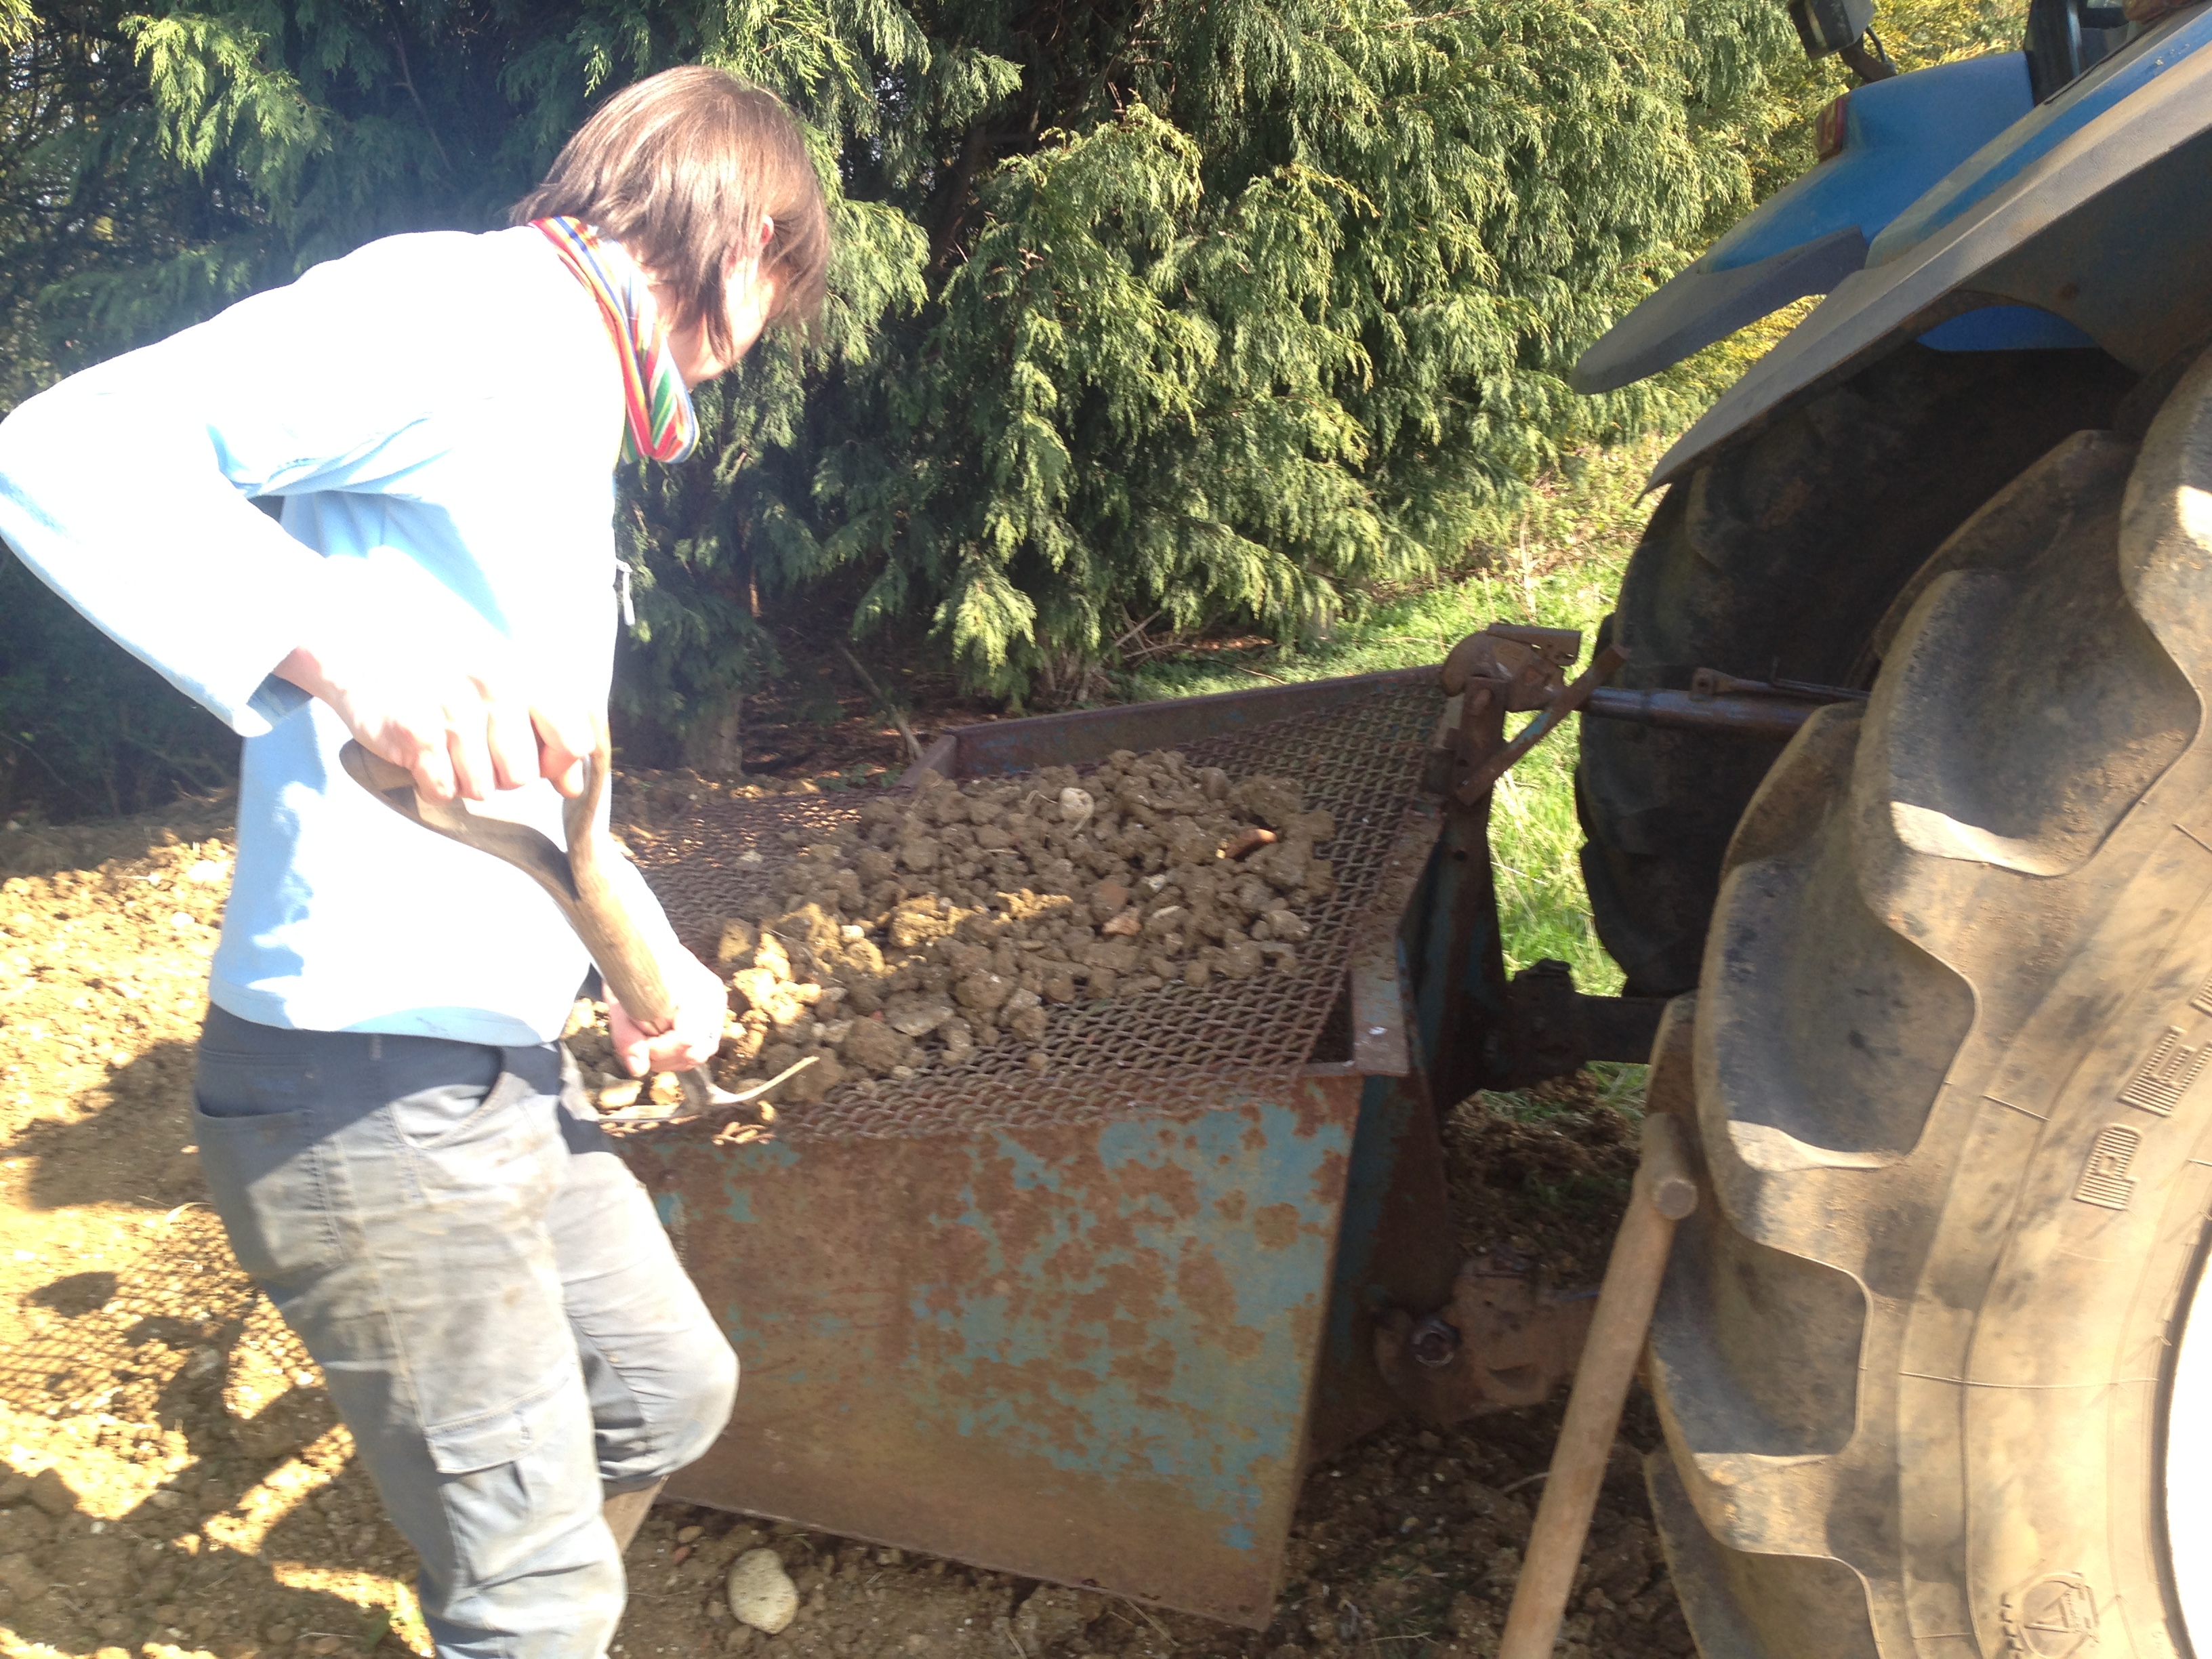
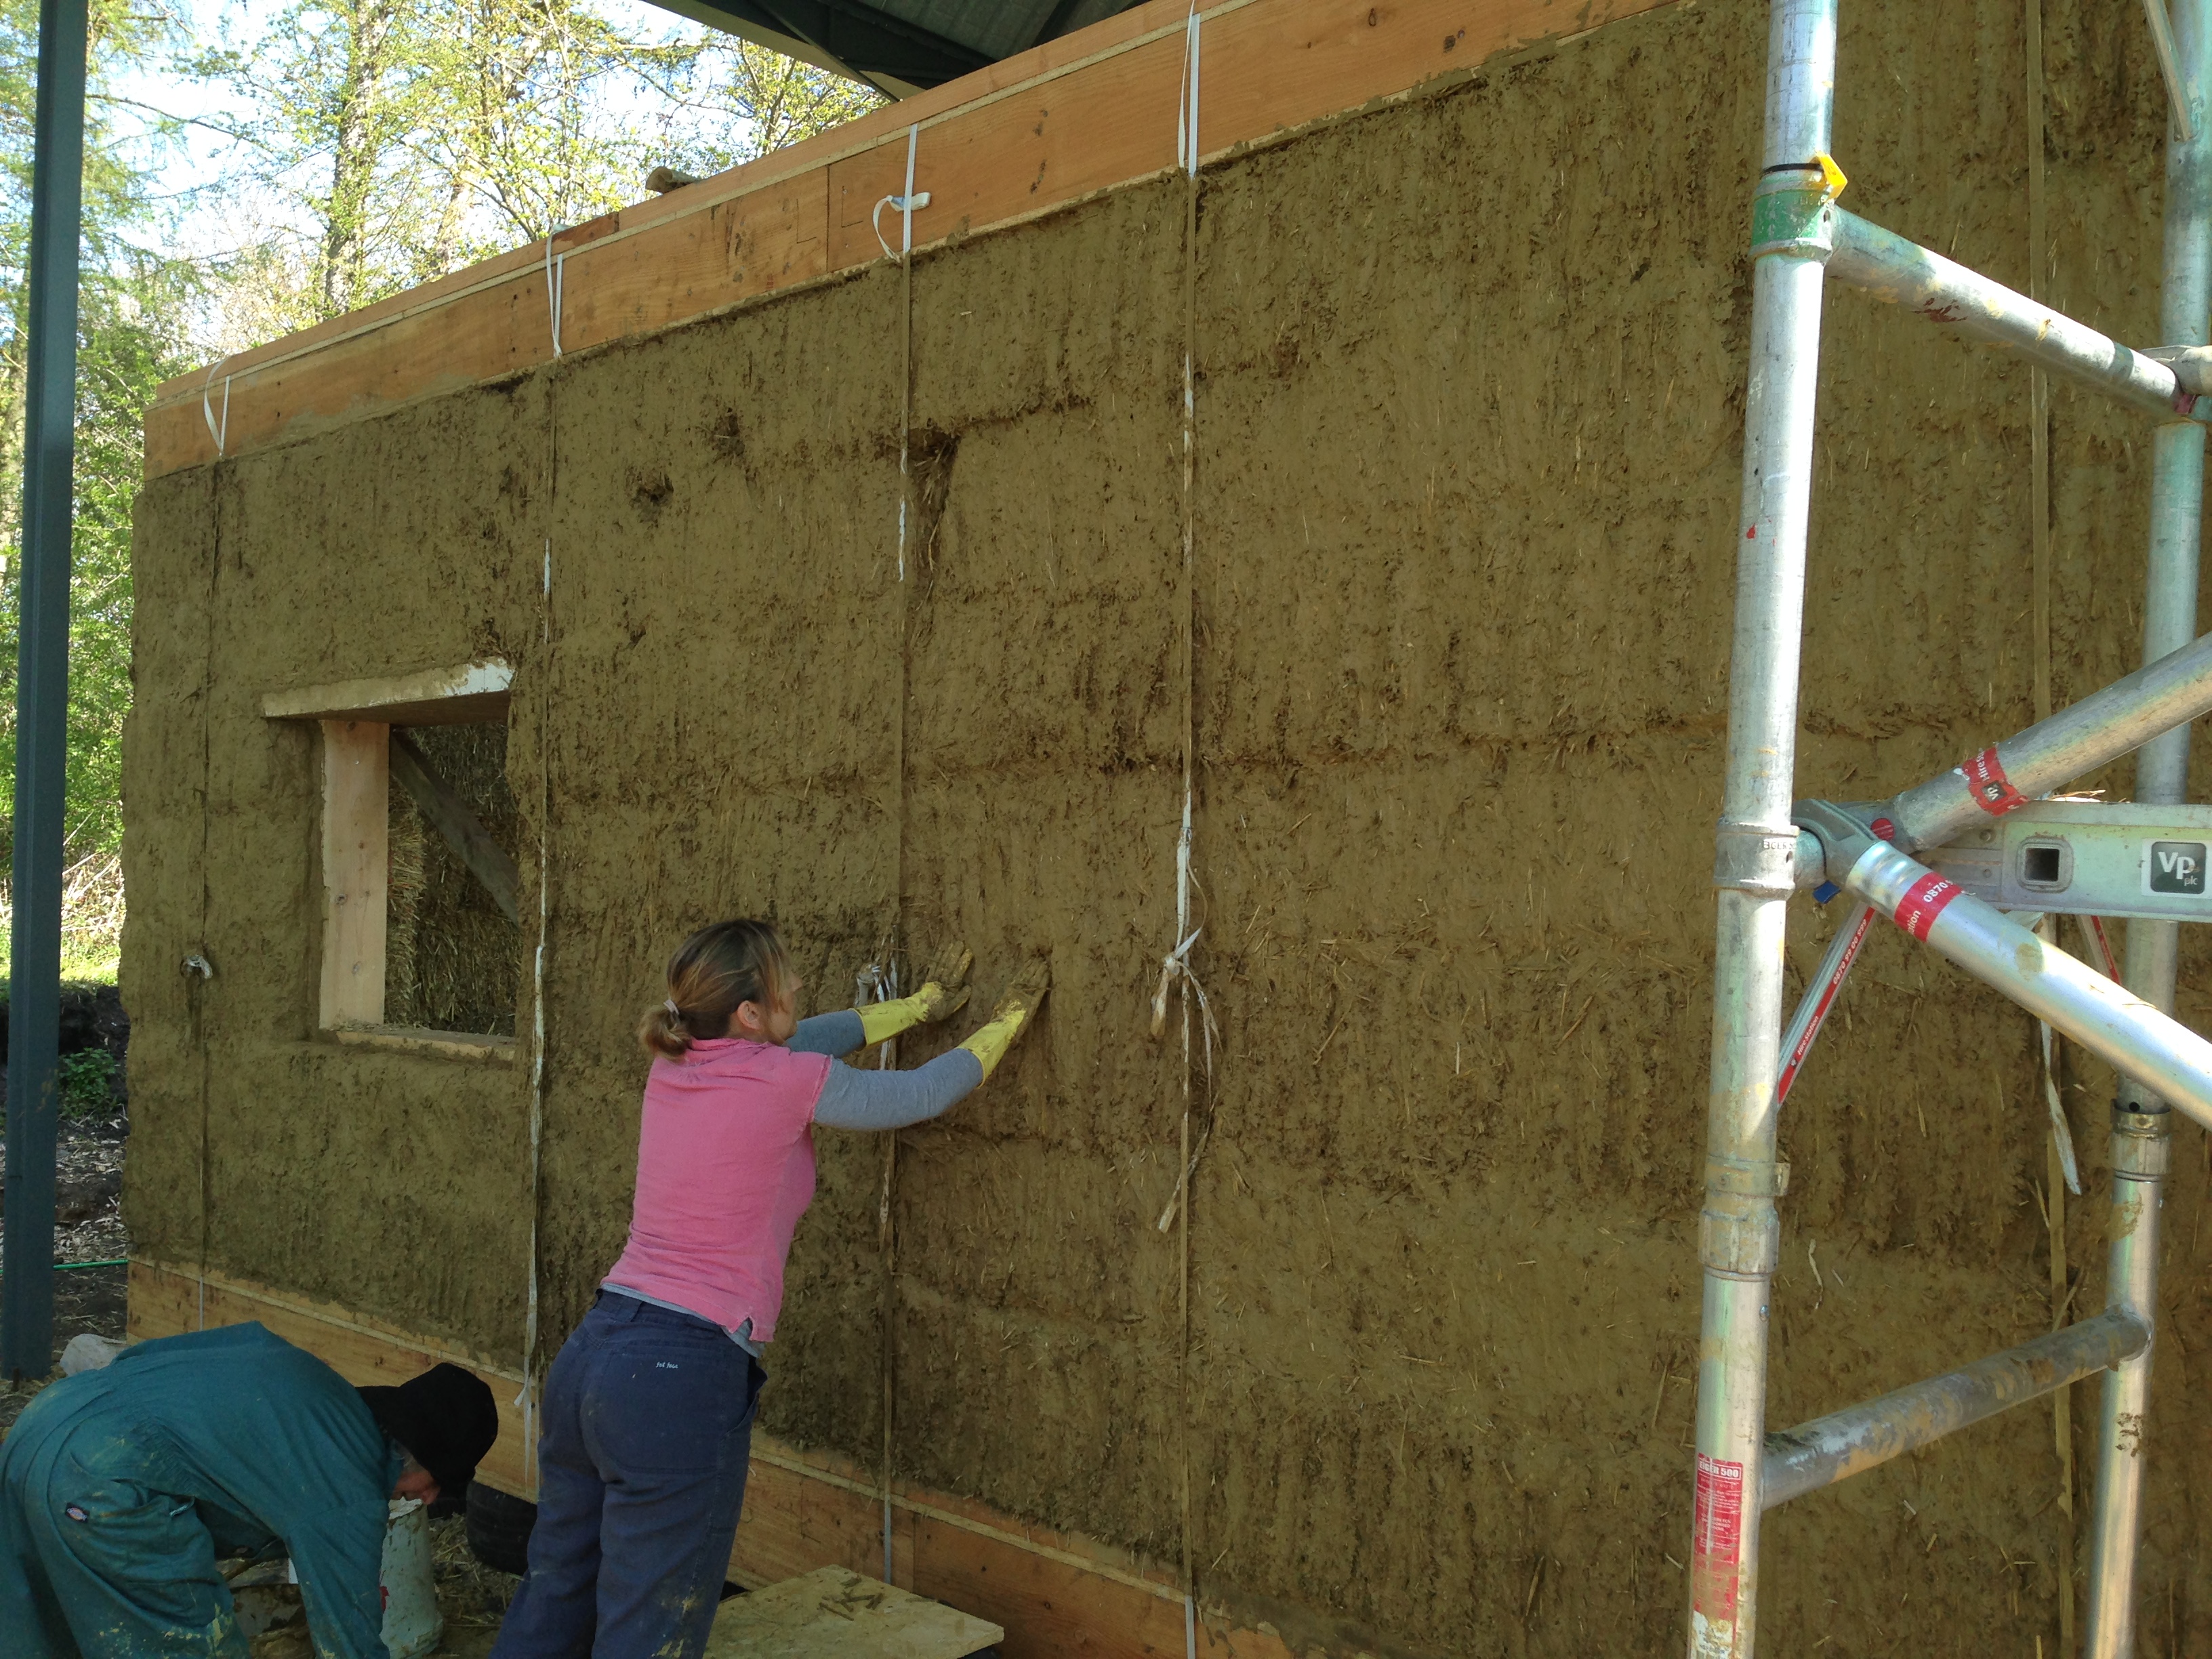
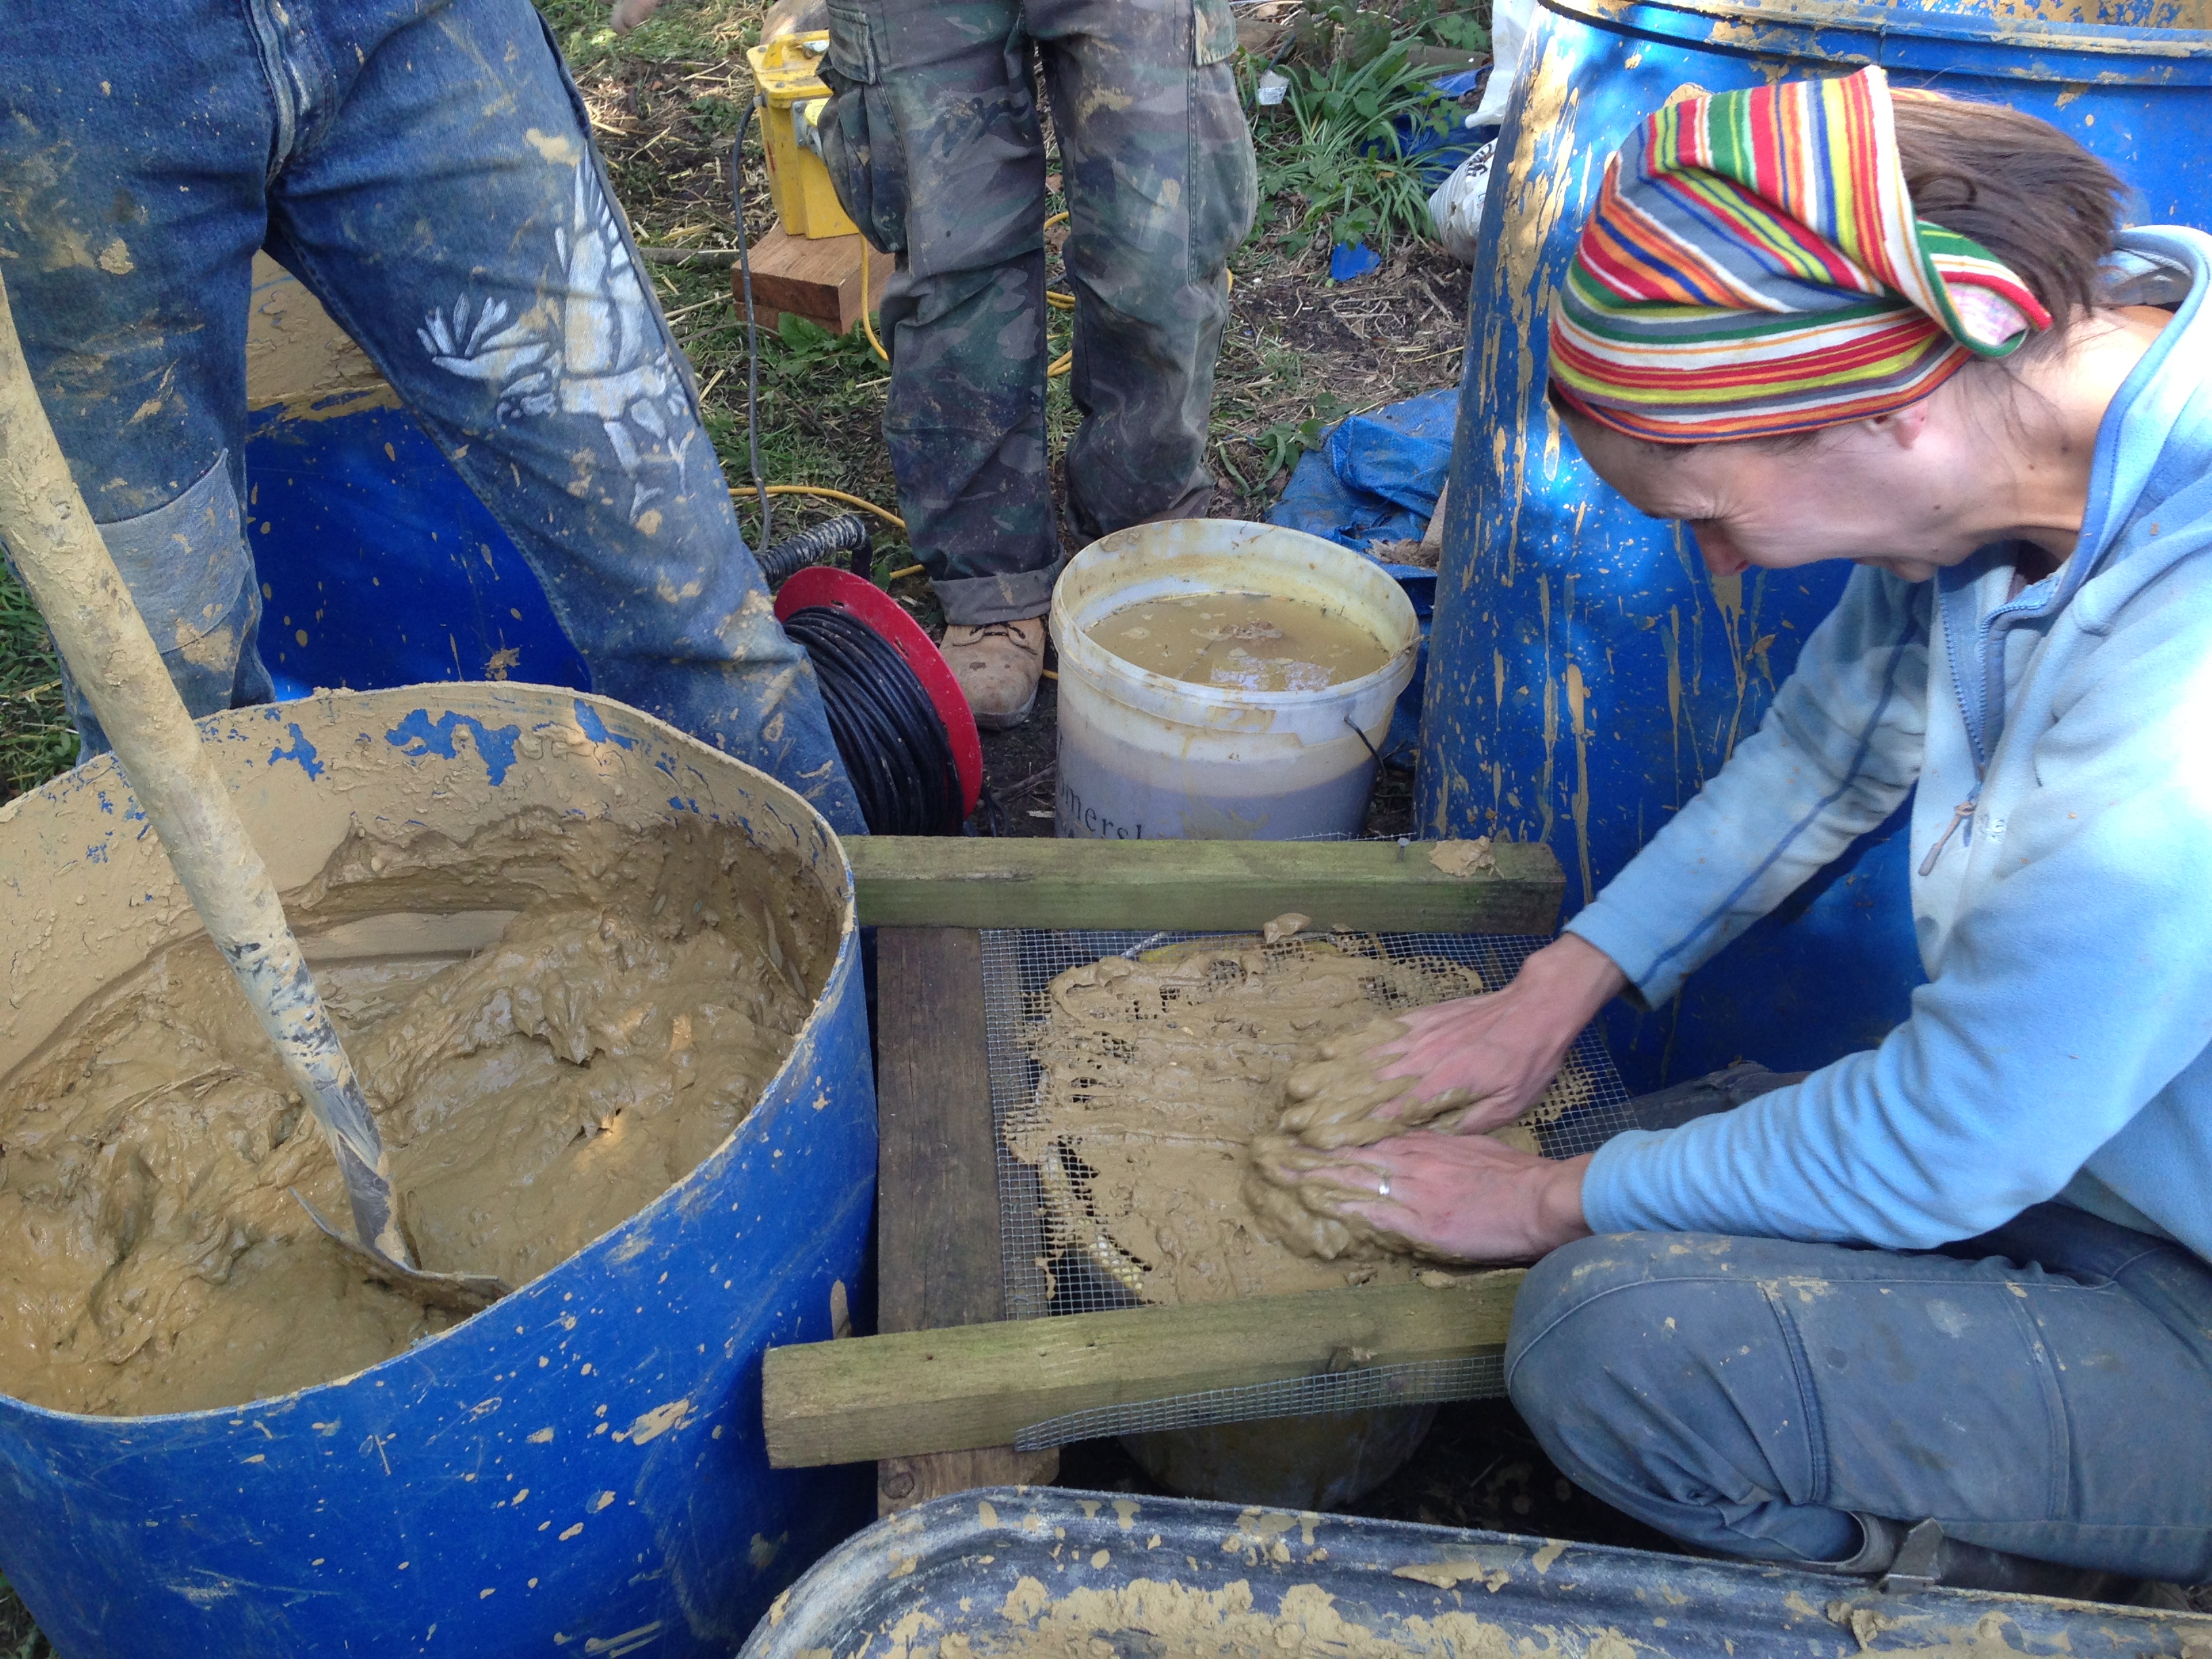
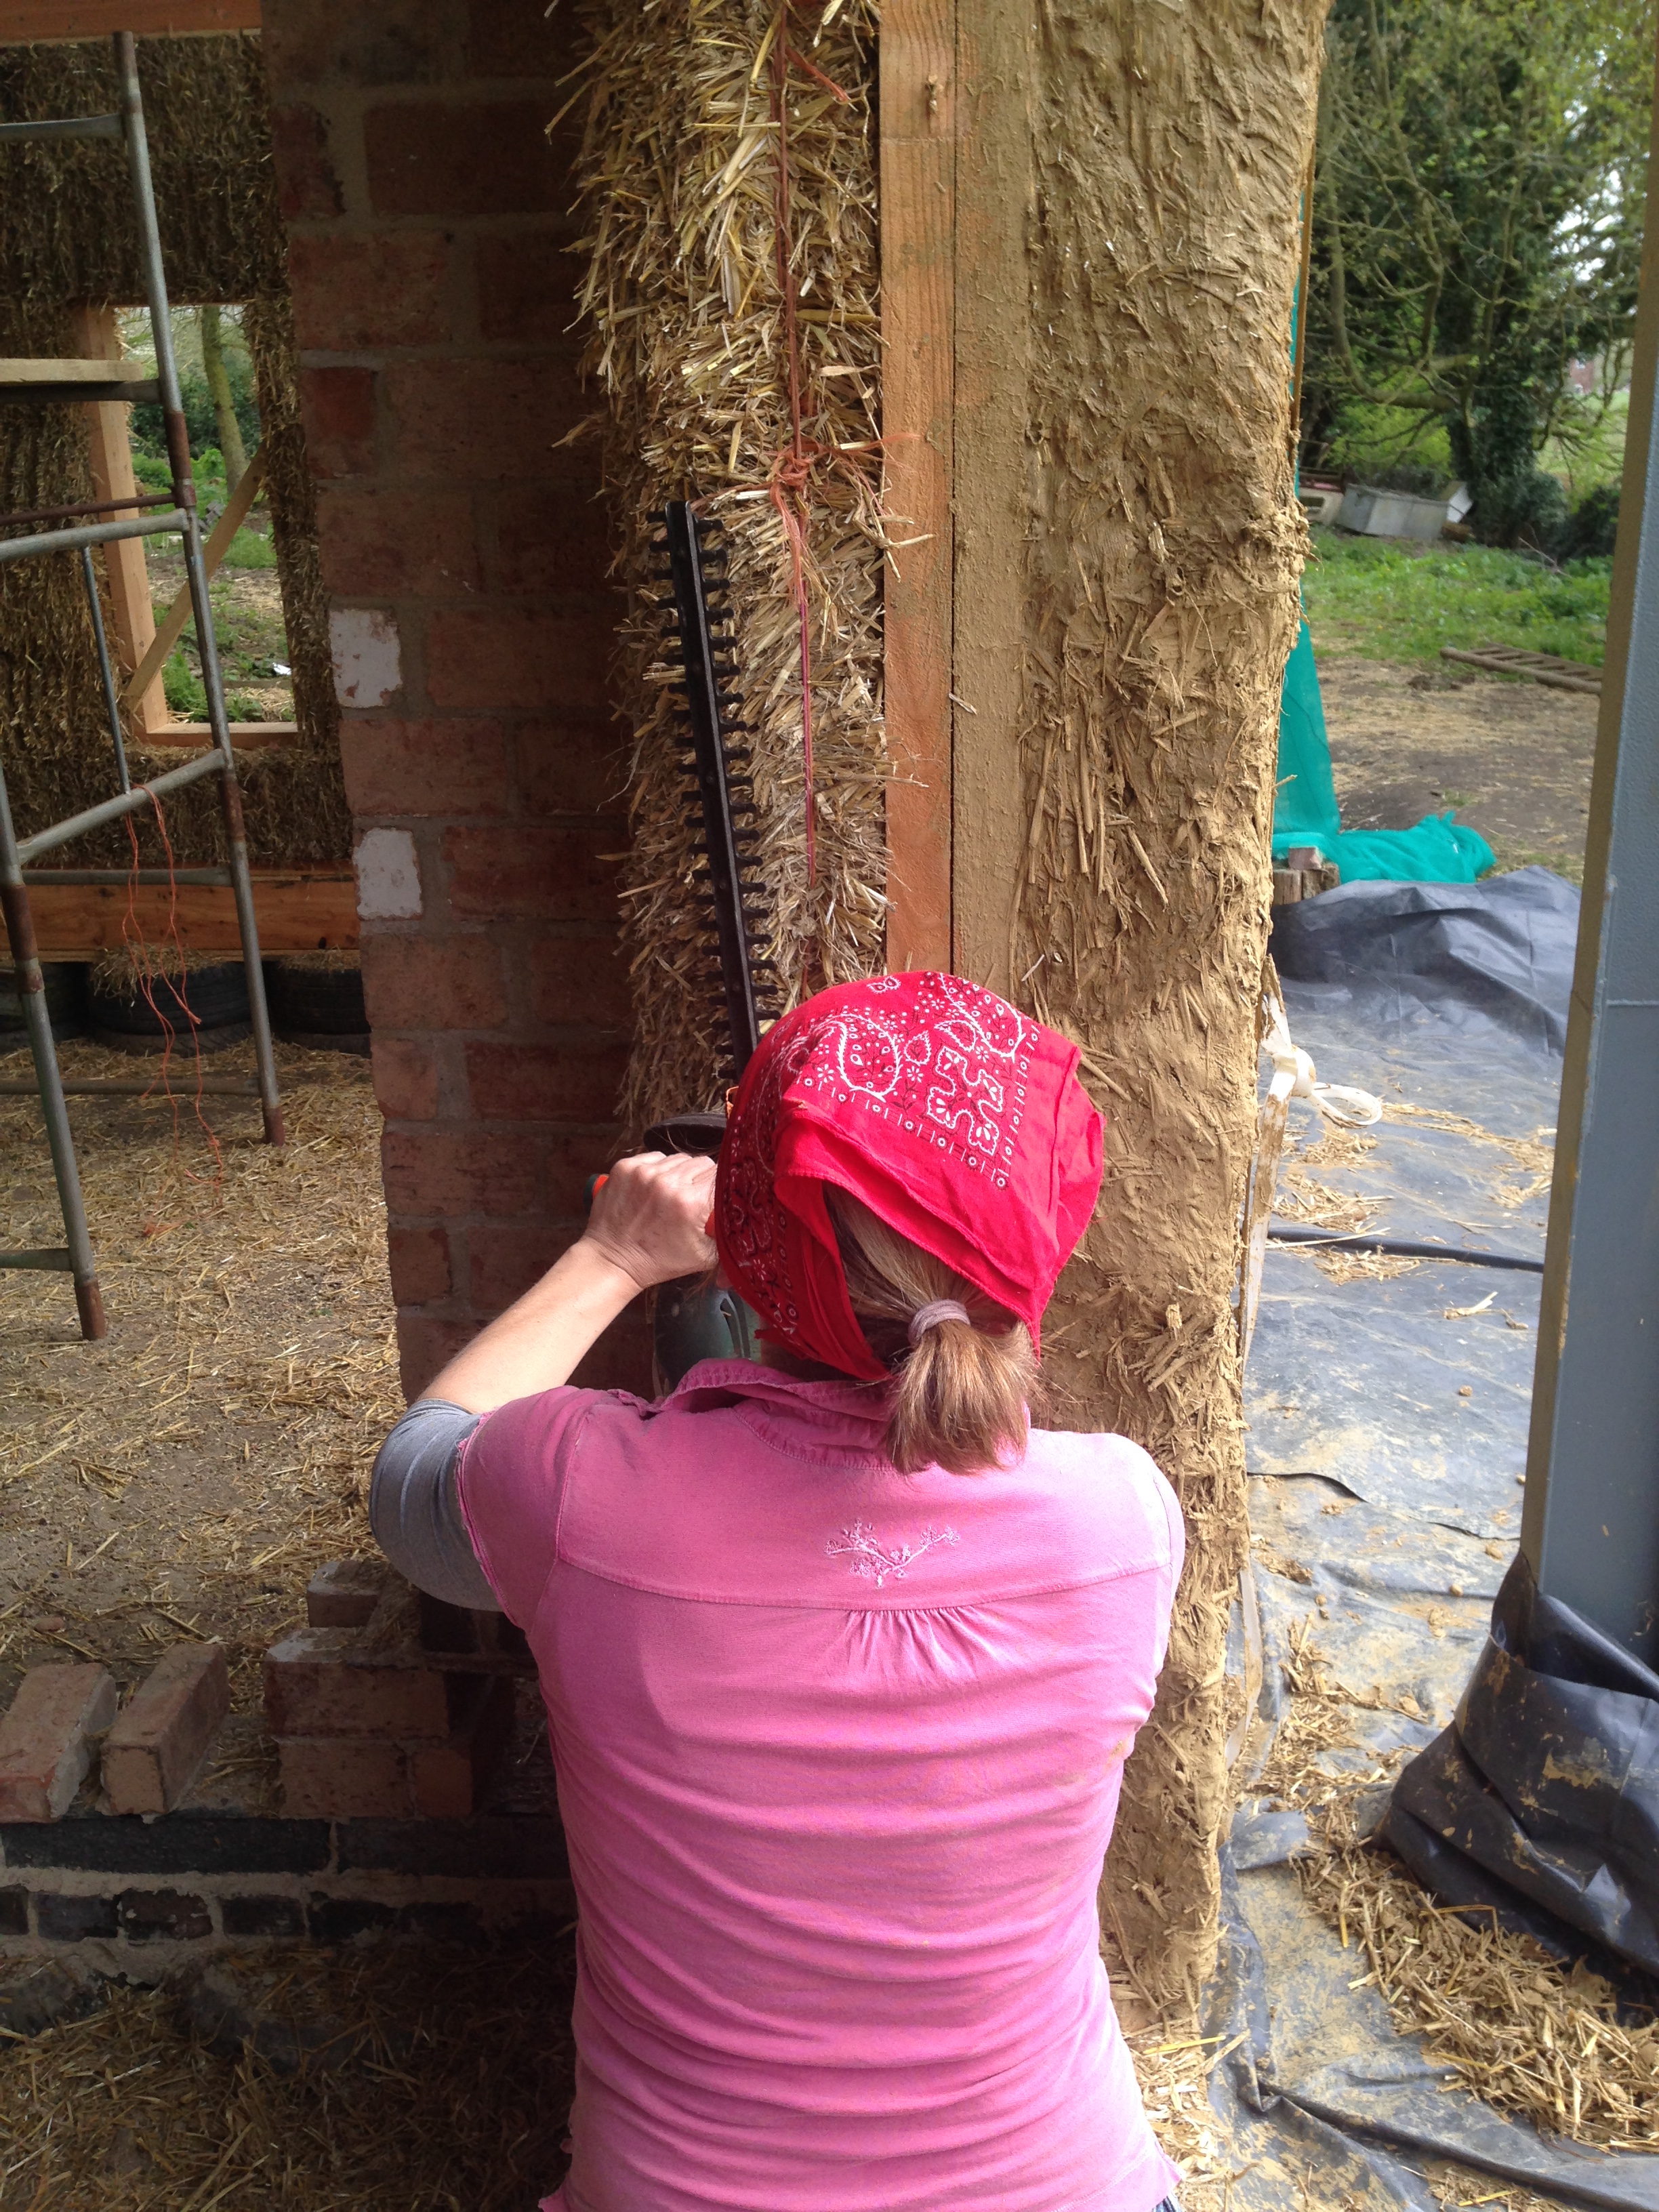
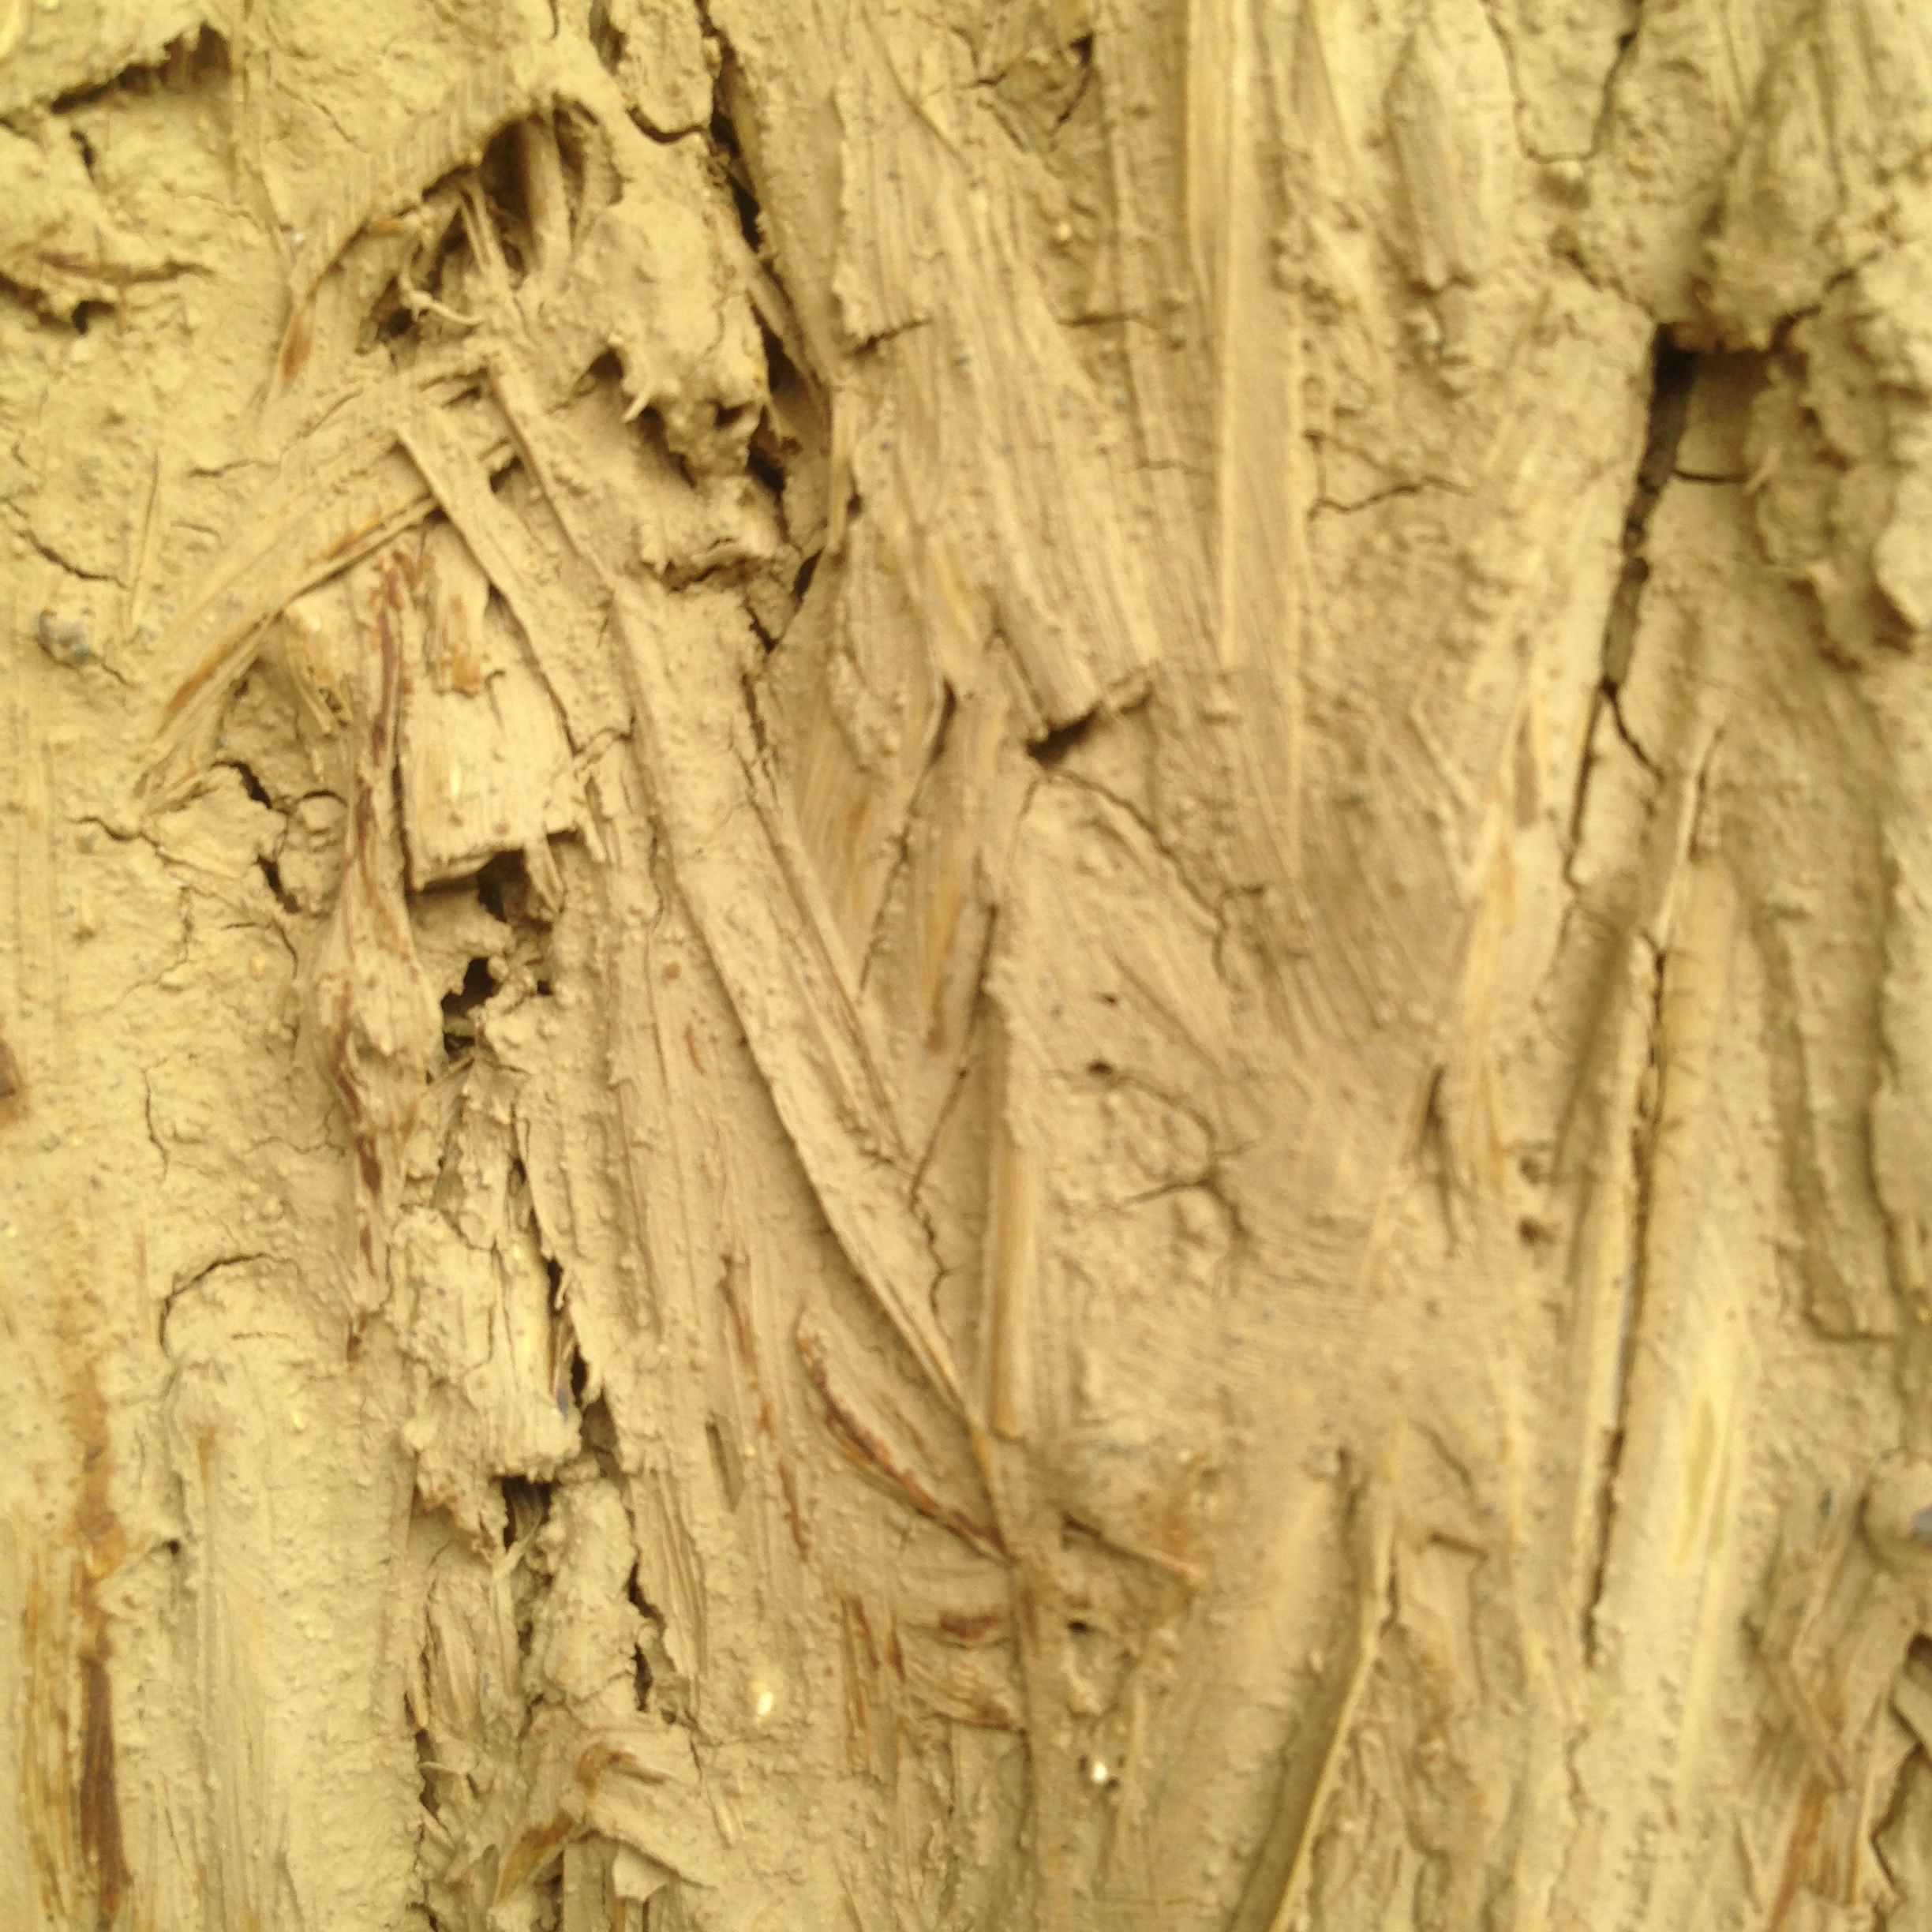
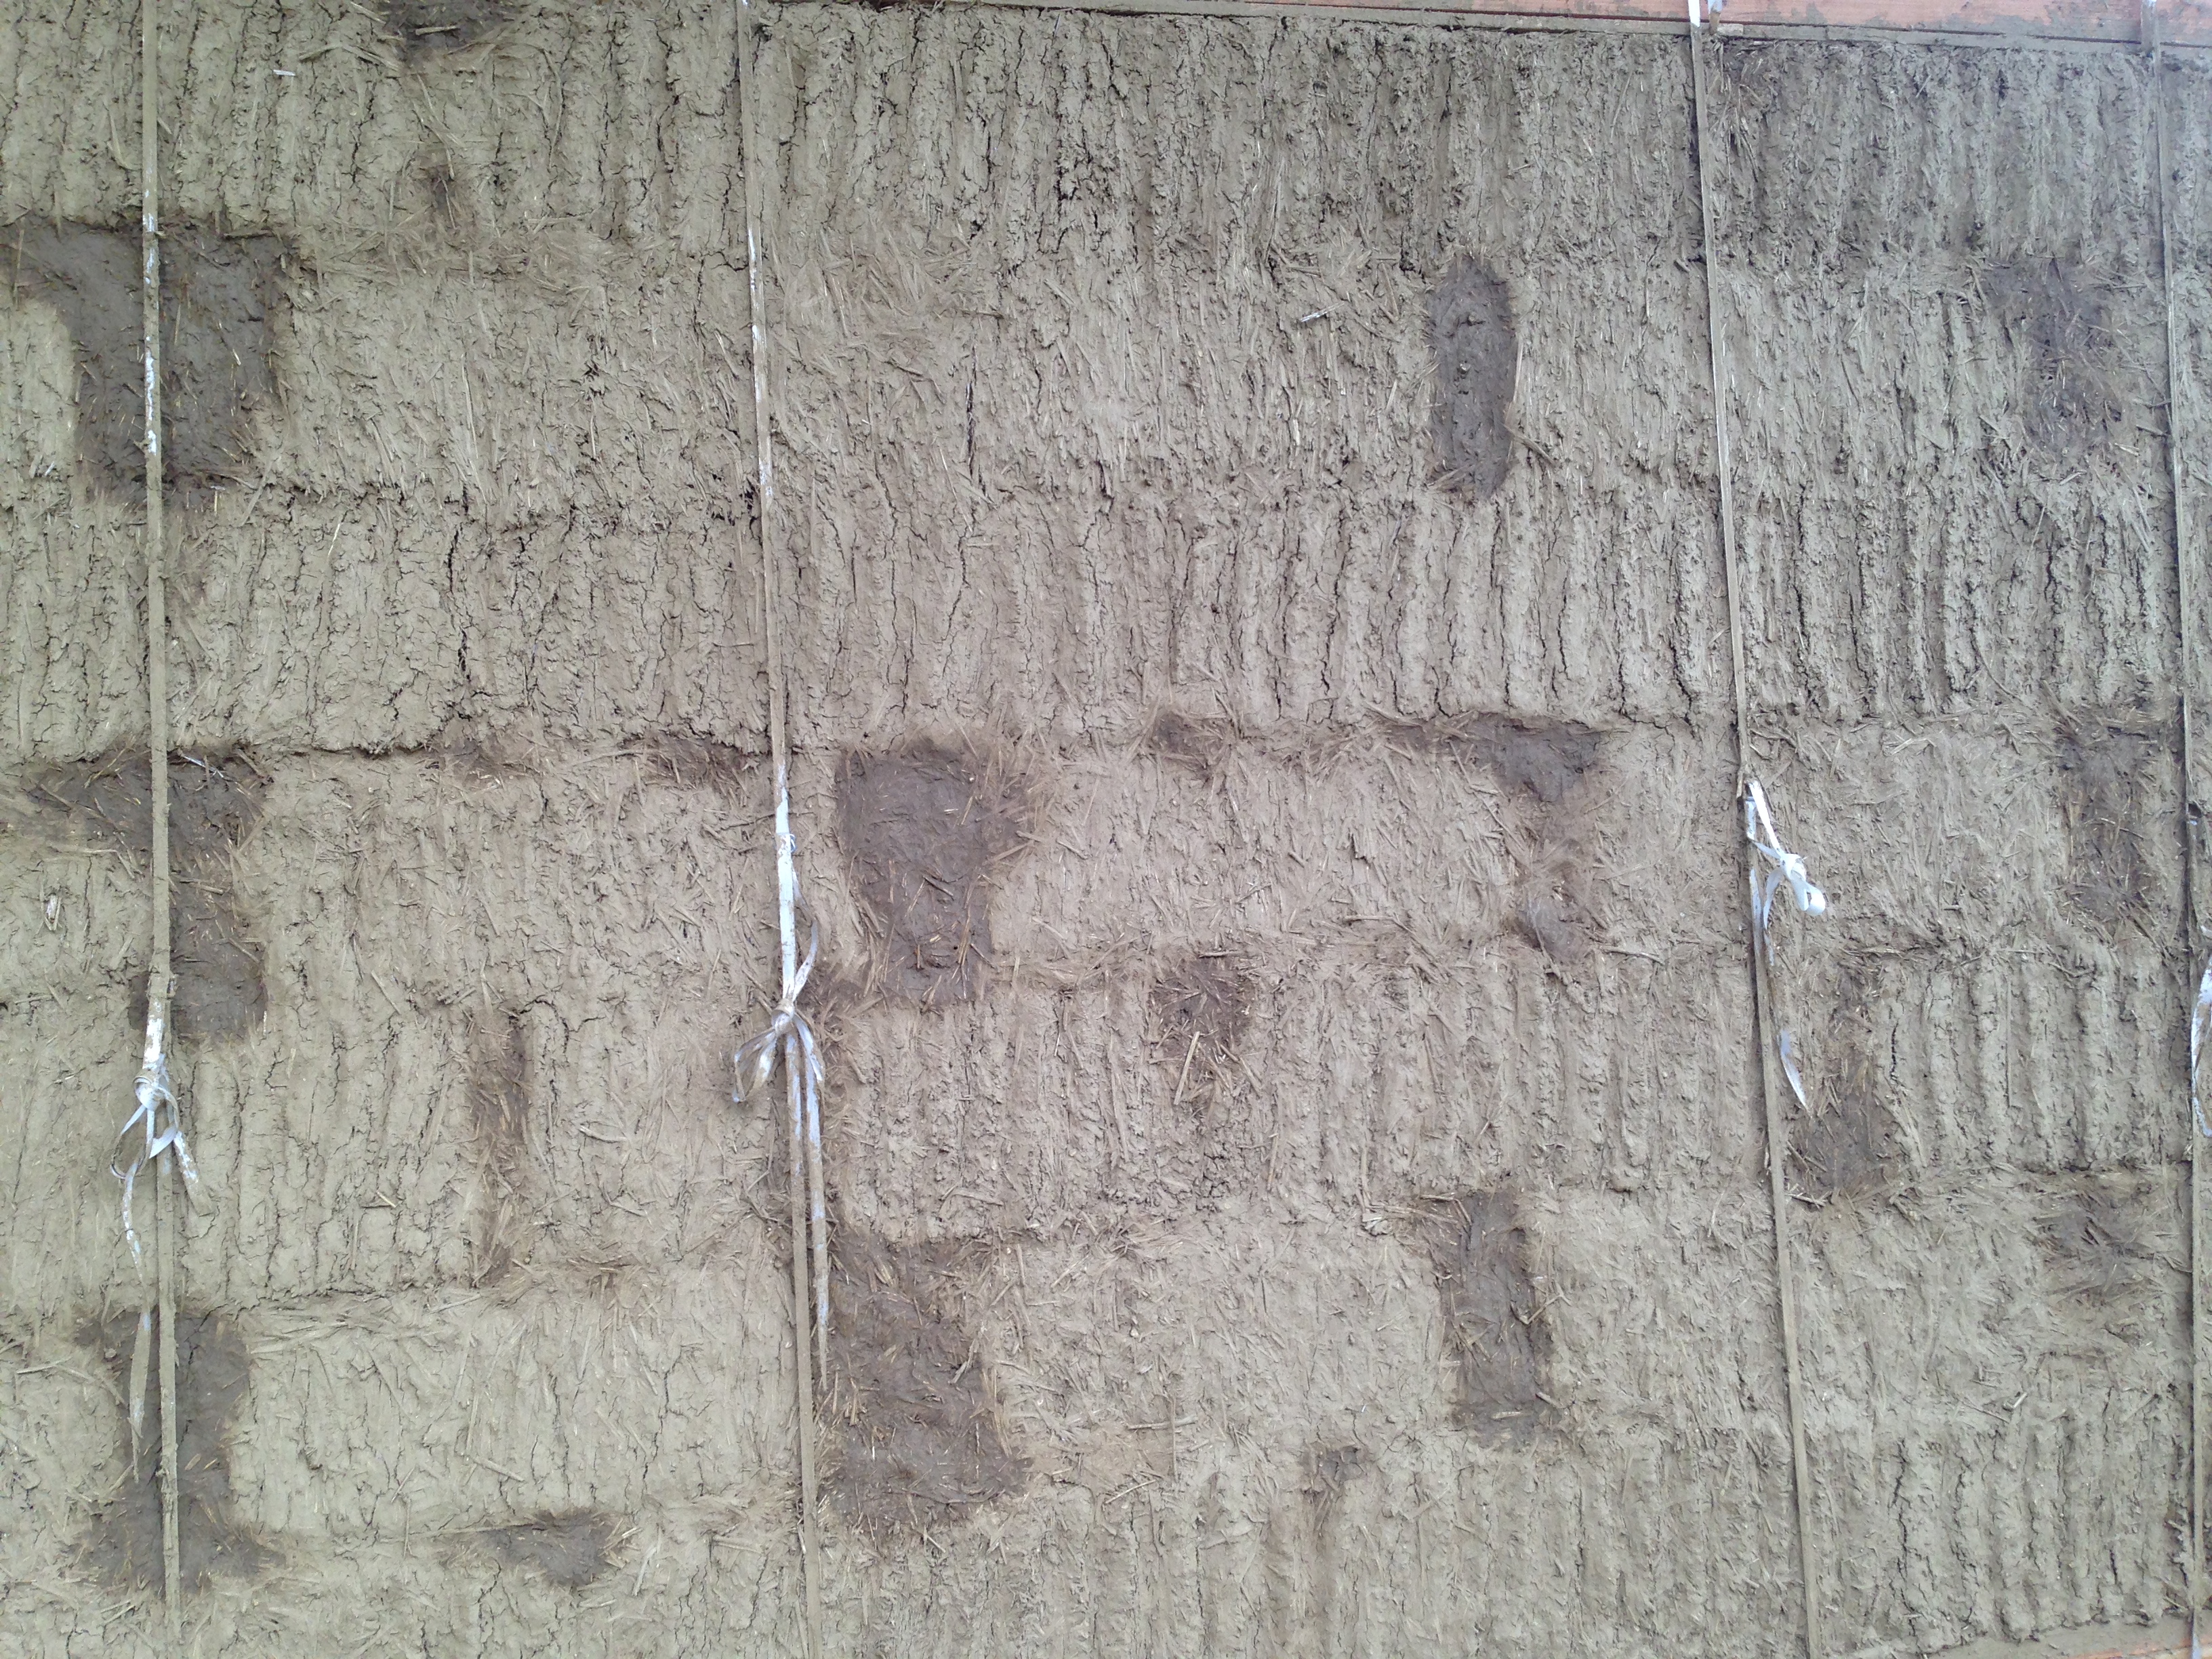
So, after two weeks hard work, we had what looked like a smart straw bunker under a shed – the ground floor walls. We said goodbye to Emma, and spent the weekend before the next course shaving the walls with hedge trimmers, and stuffing as many of the obvious gaps with more straw. Alongside this, we scoured the farm for suitable containers, and shovelled quite a lot of clay. The walls are to be coated with clay plaster, which we tested for constituents and properties earlier. We collected around 1/2 a tonne of clay sub-soil that had been removed during pond construction elsewhere on the farm a few years ago, and started to soak it.
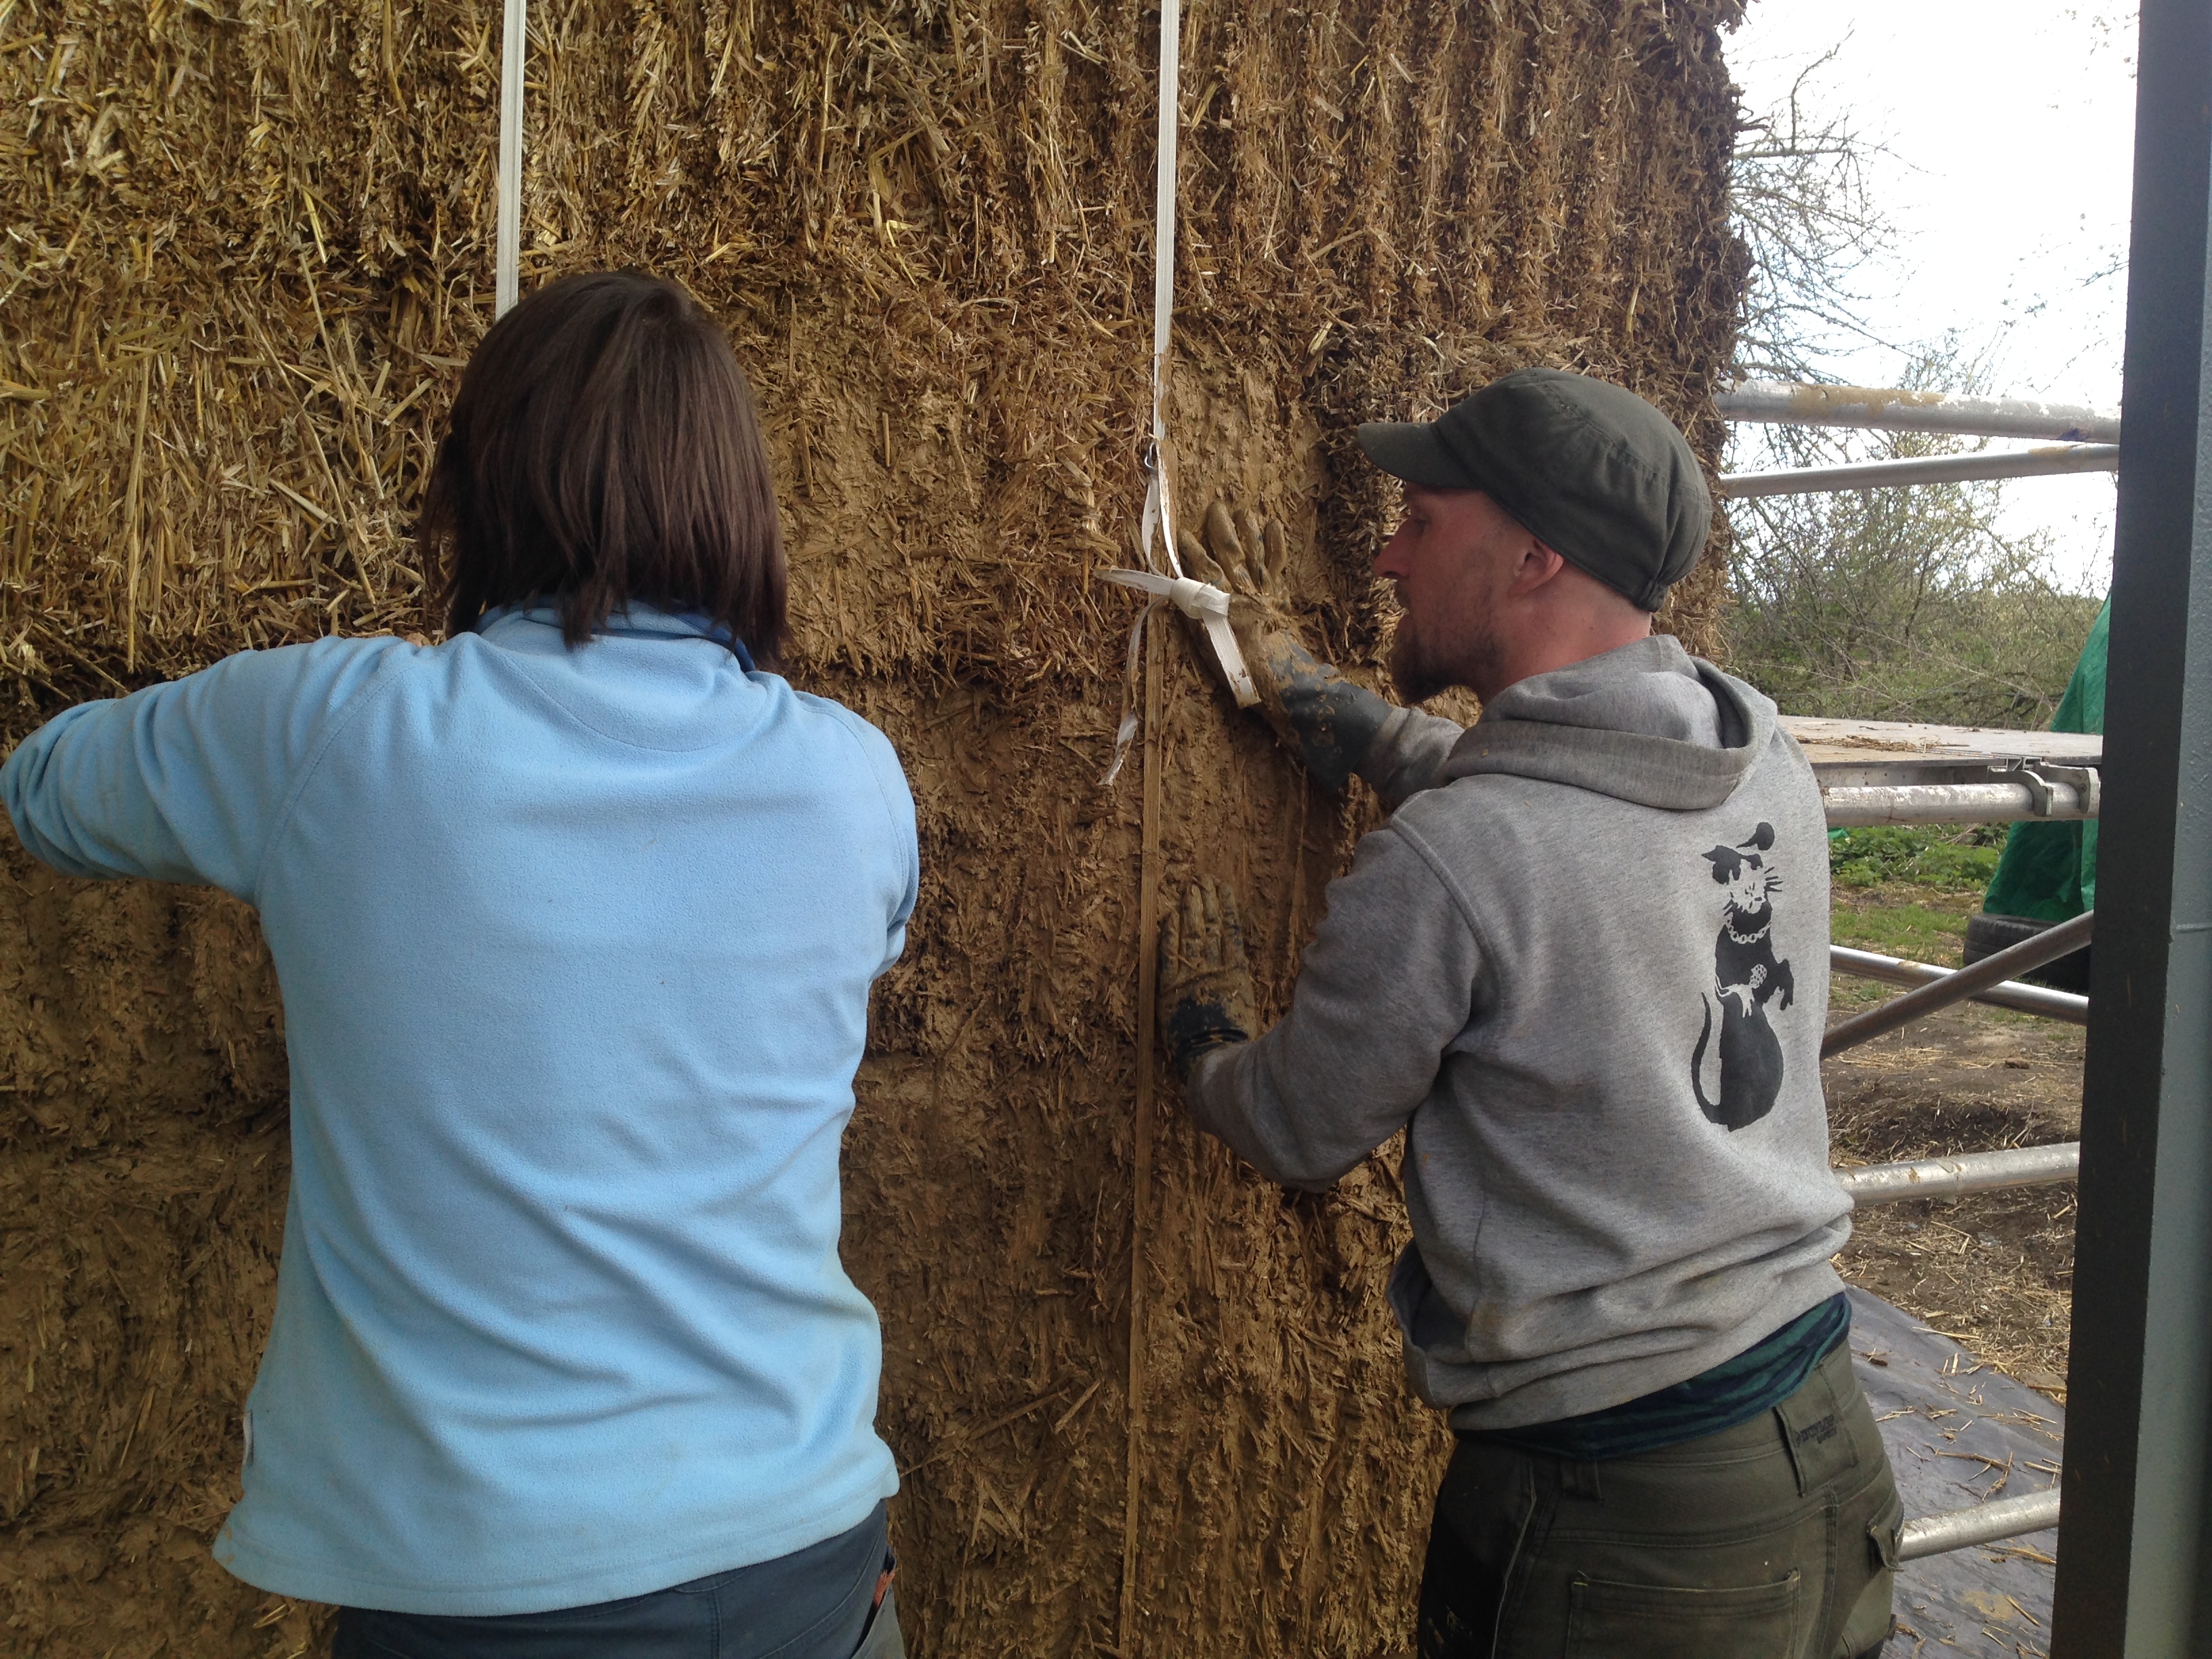
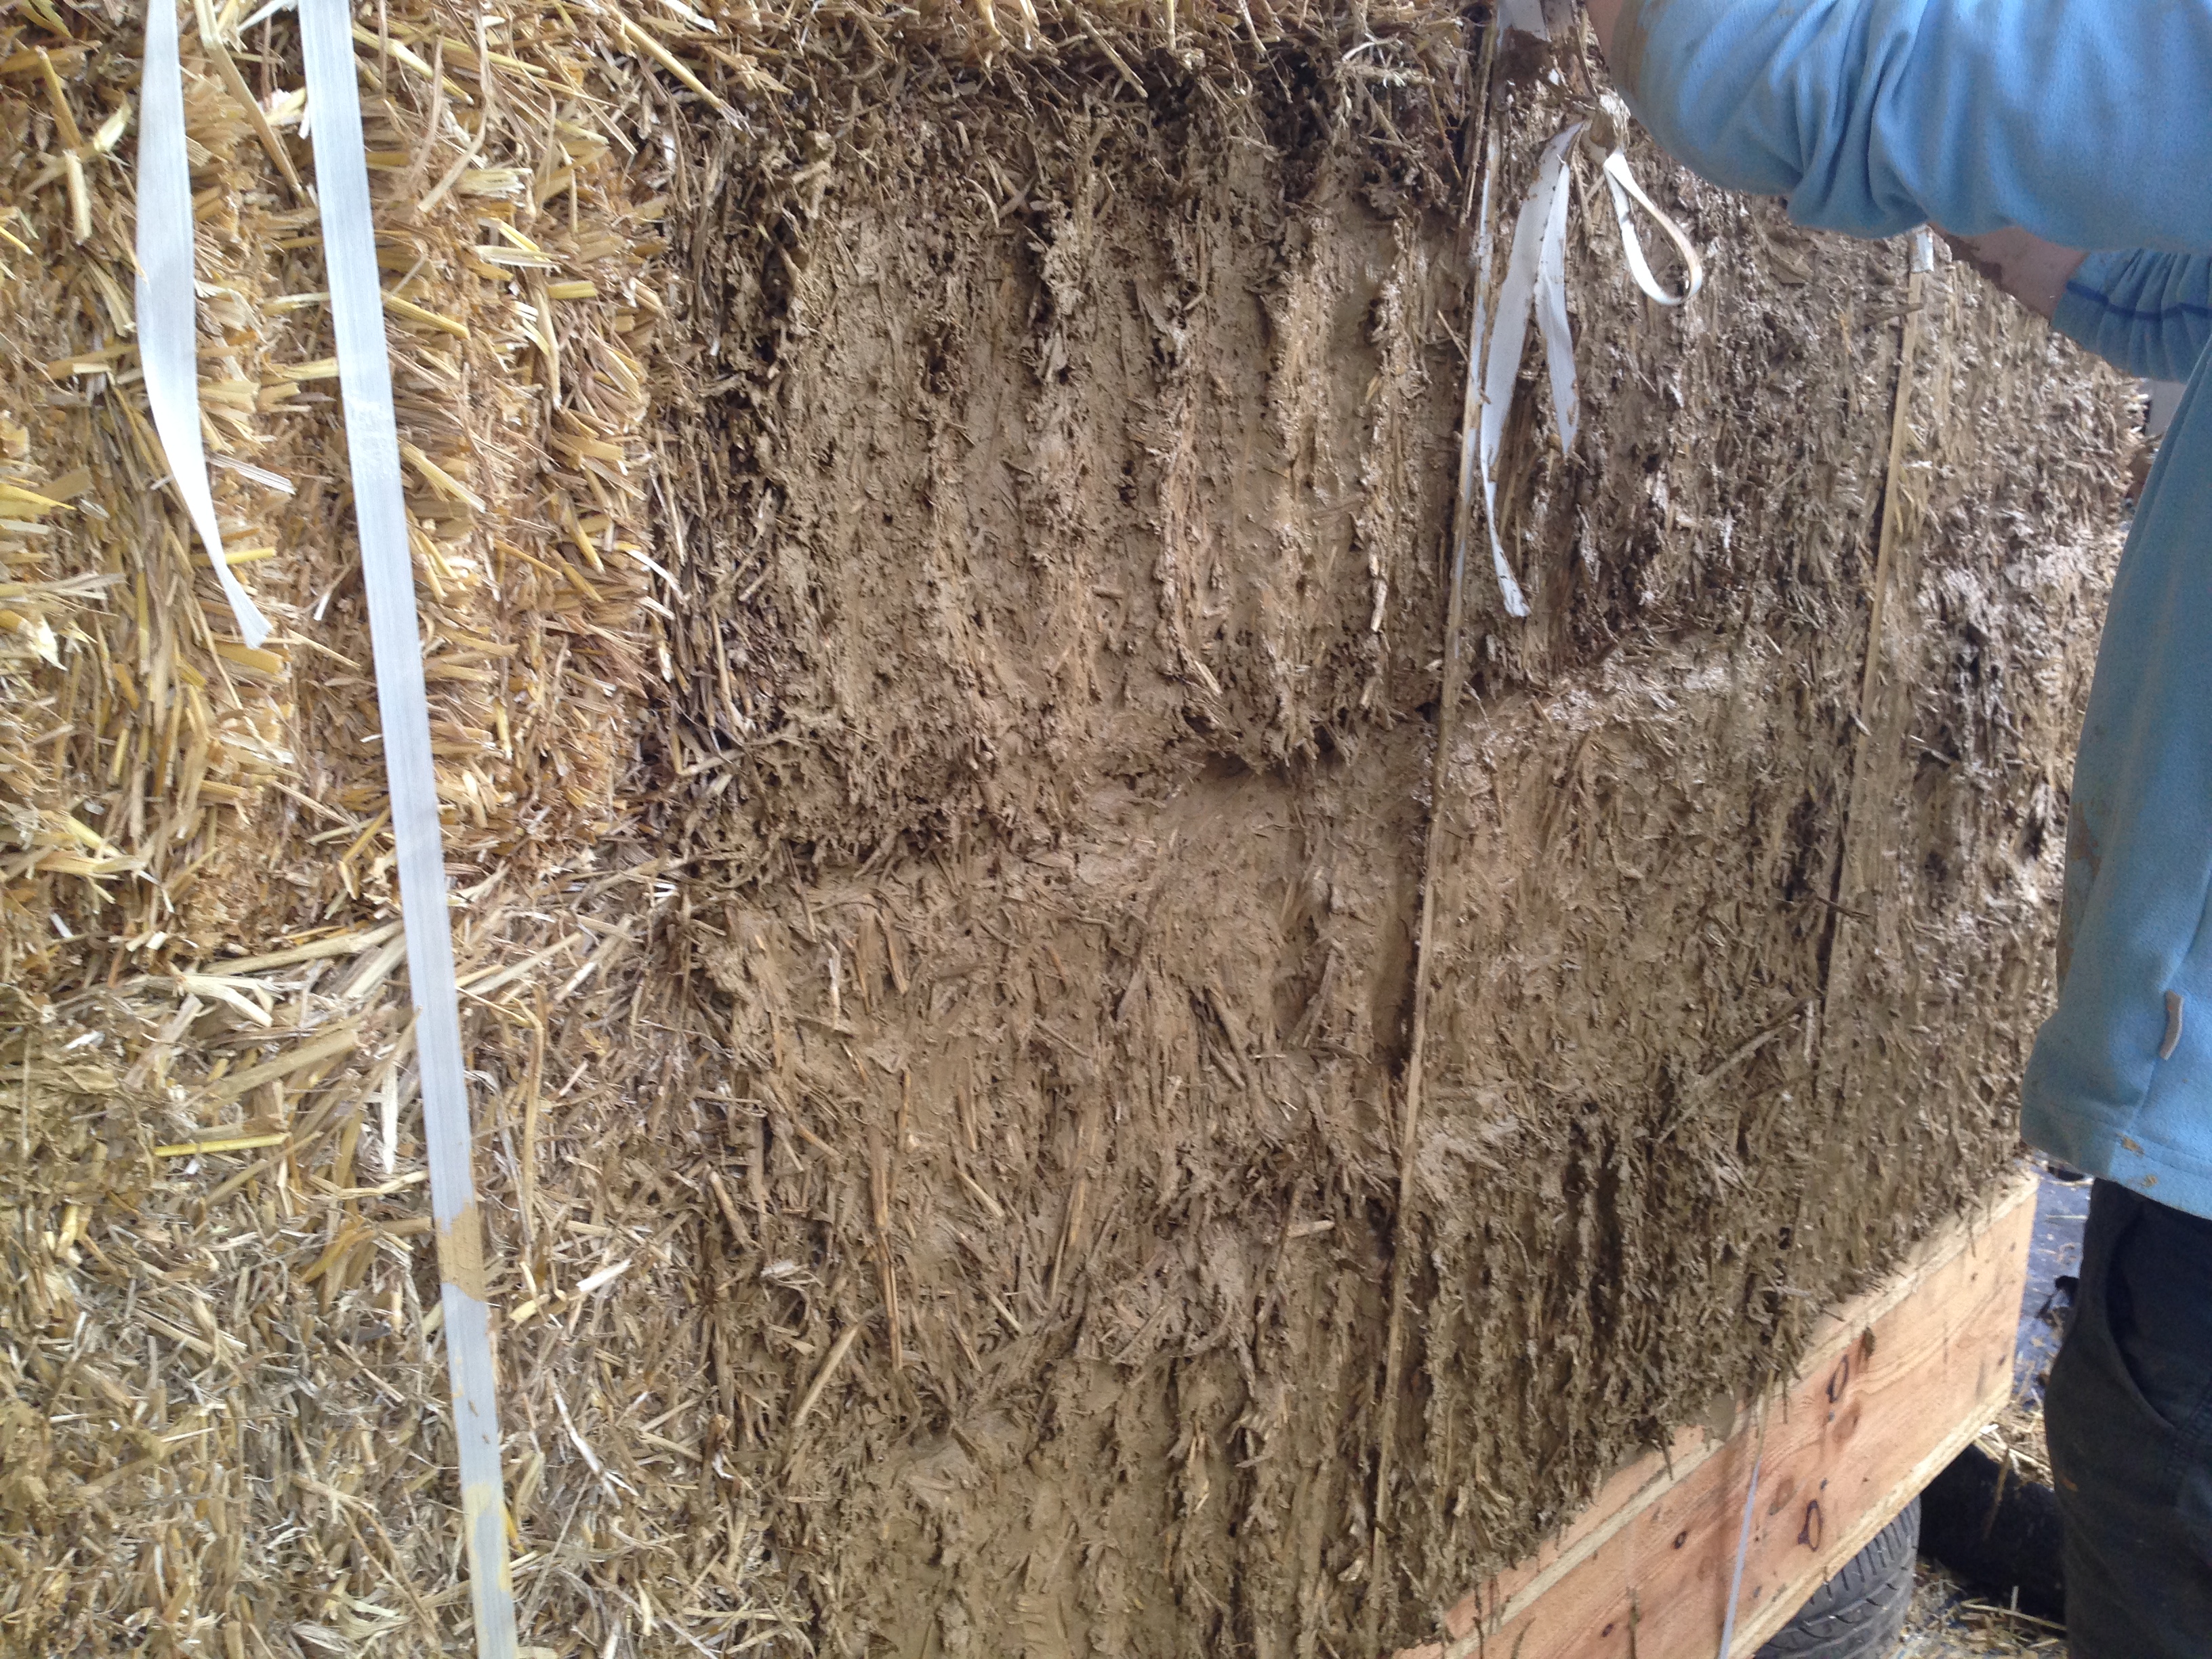
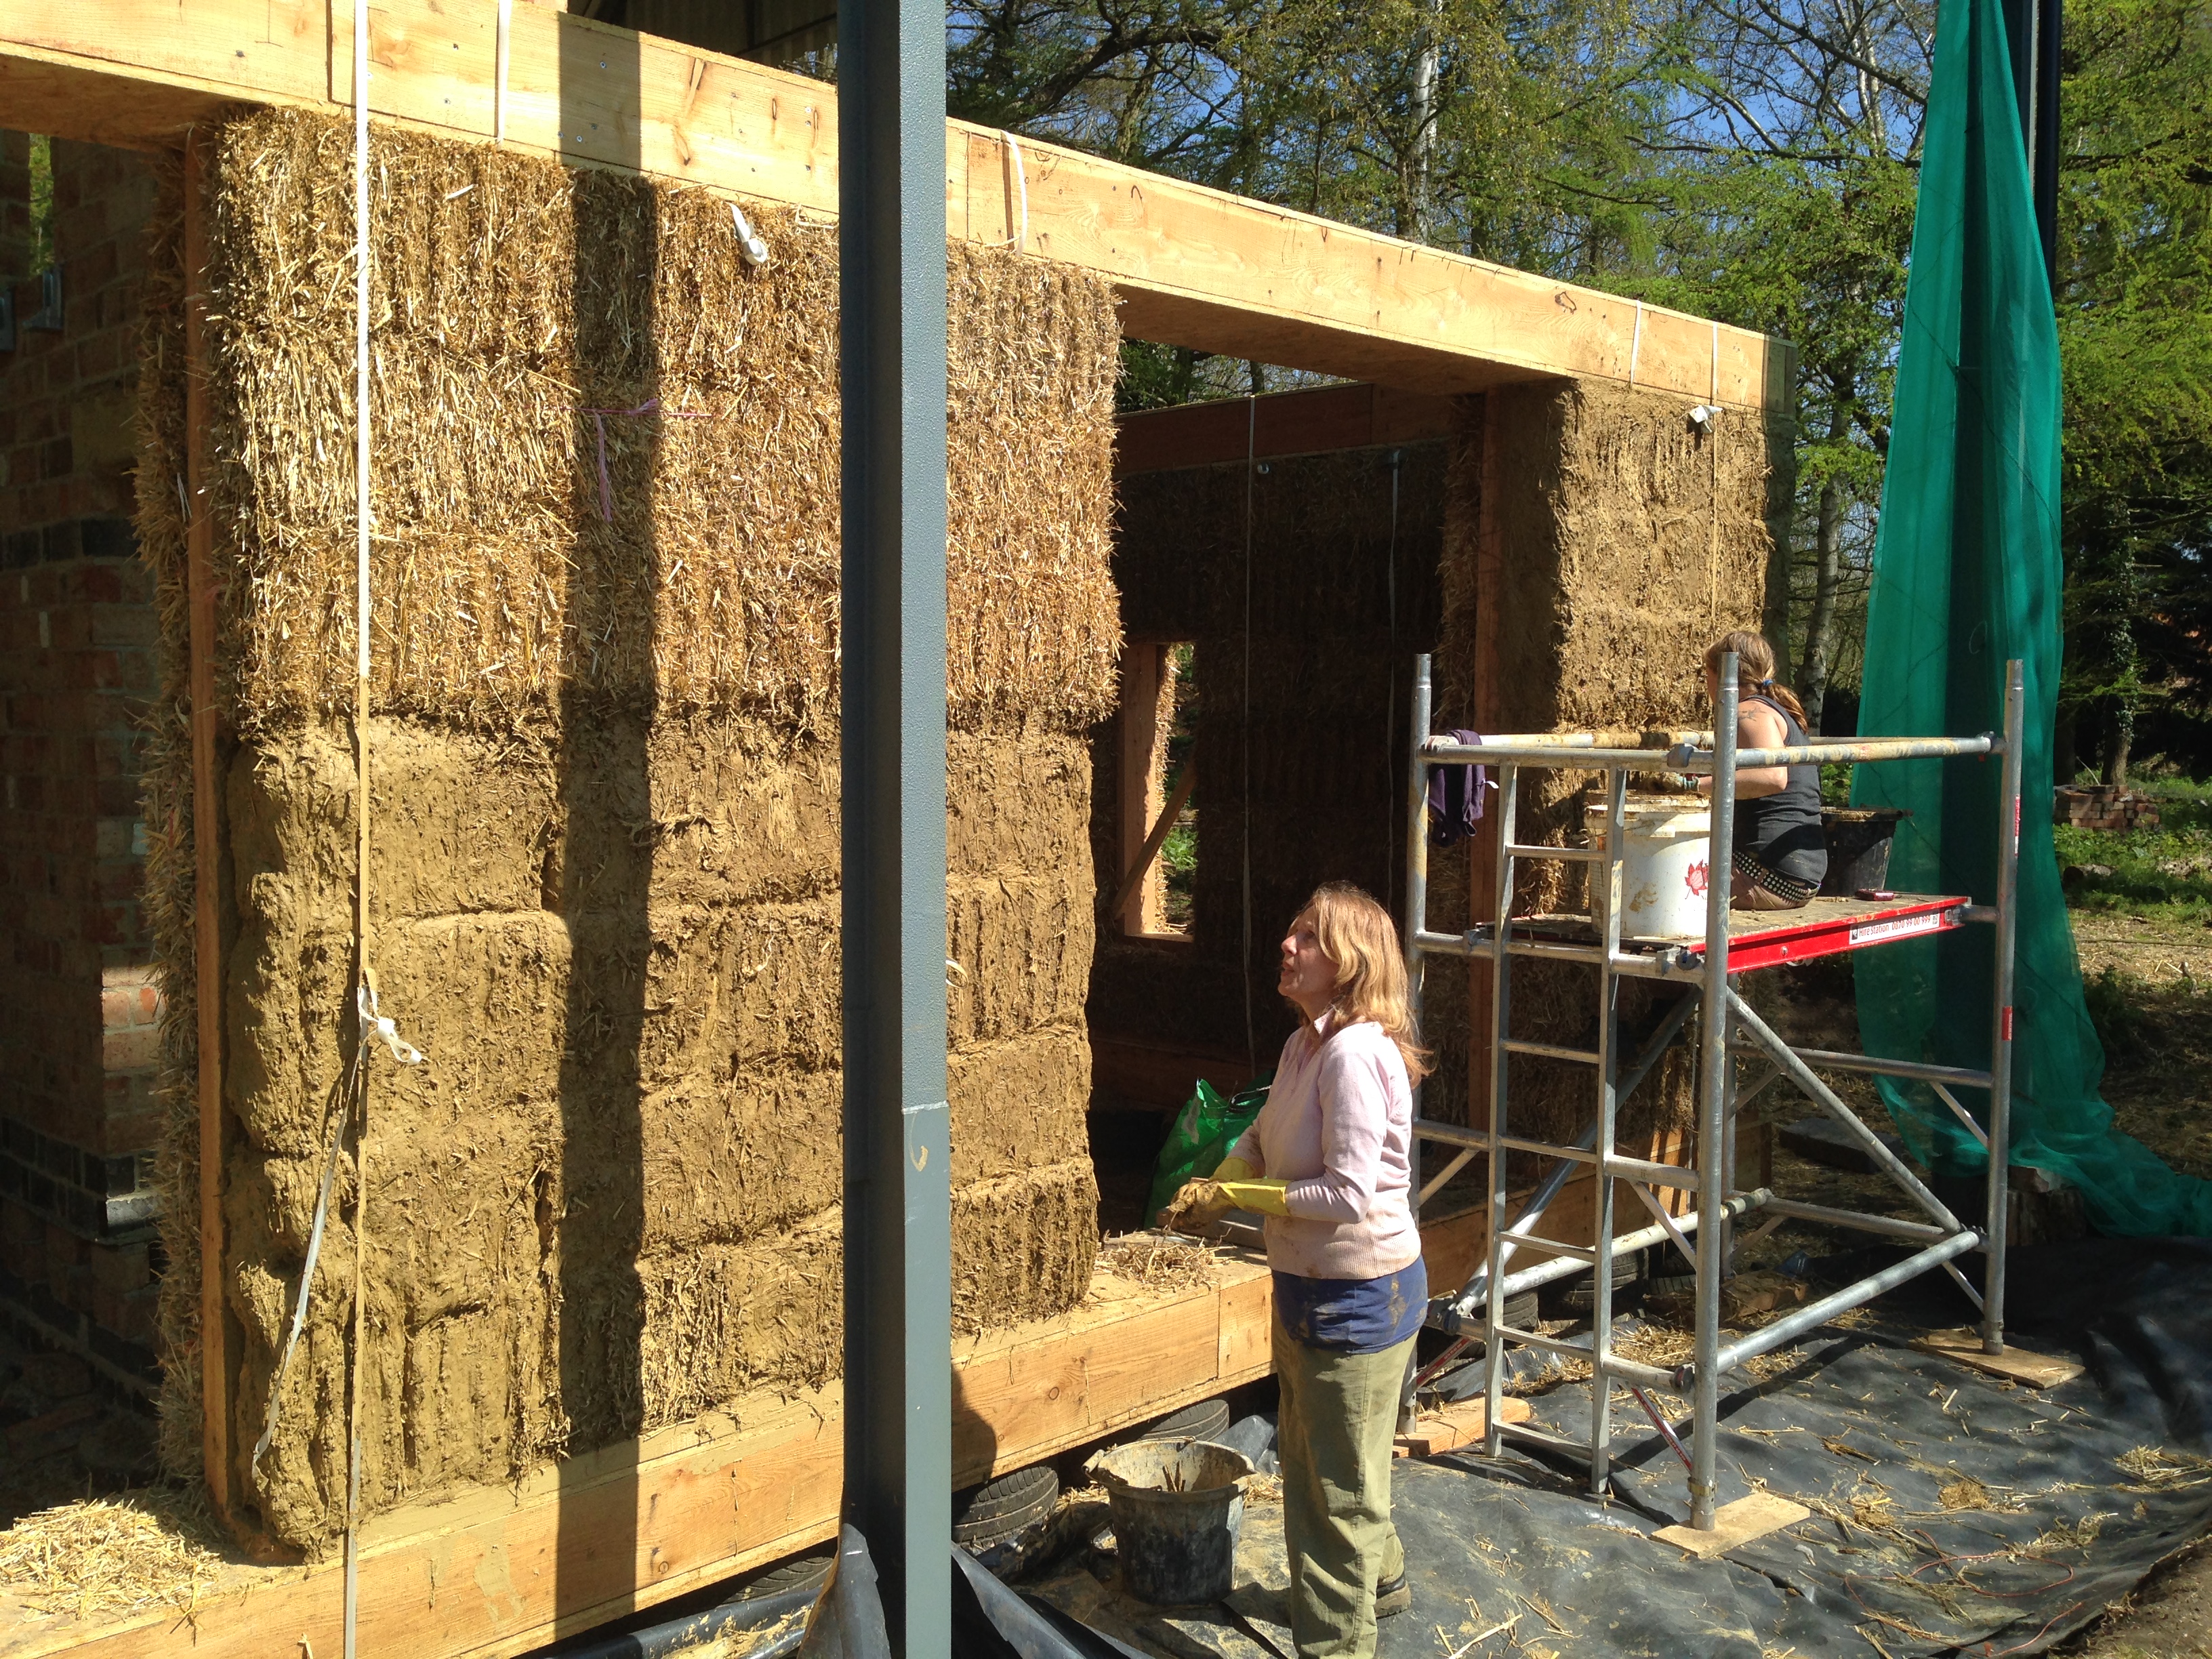
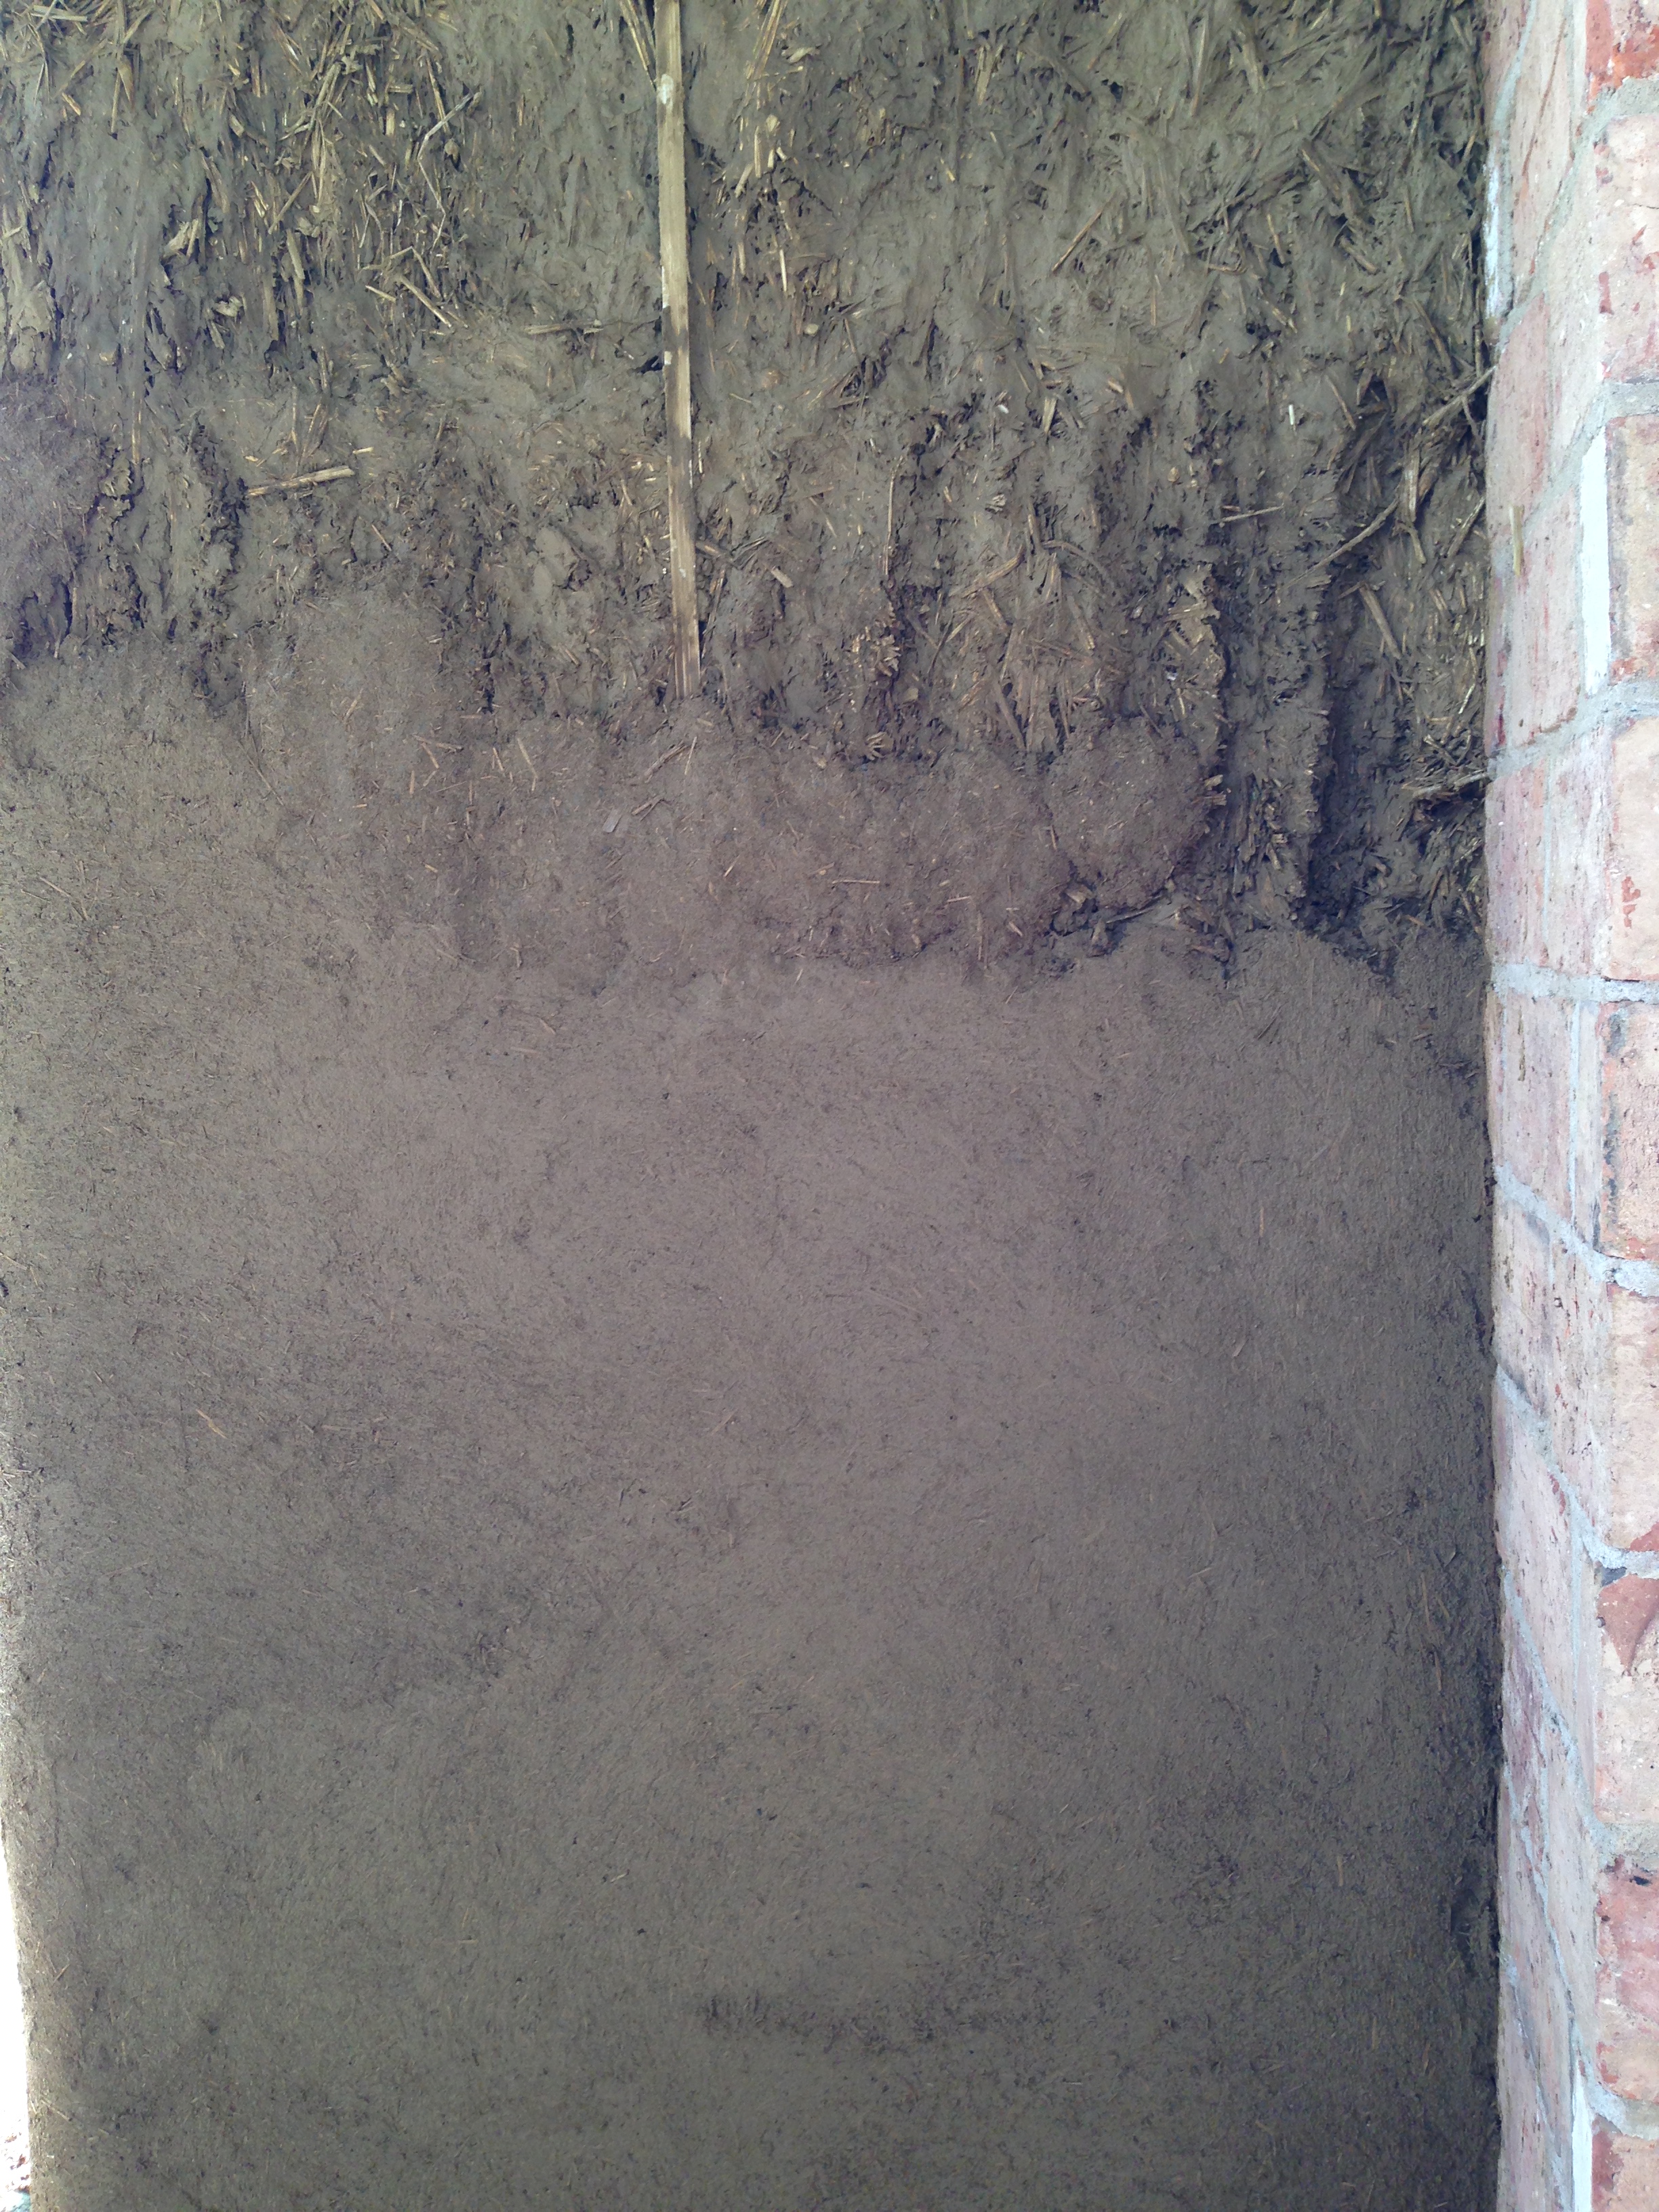
So dawned the third course – clay plastering, and we welcomed Barbara Jones of straw works to teach us how to turn a heap of clay into acceptable plaster. The first part of this was relatively easy, mix it with water and rub it into the freshly trimmed straw walls. This simple coating dries to form a thin protective coat on the walls, and a base for further smoother plaster. It also shows up all the holes and gaps in the walls. We then filled these with a mix of dry straw and then straw and clay mixed, to ensure good insulation. For the outside of the walls this was it, as they’ll be covered with larch cladding to give weather protection. Inside, this clay ‘slip’ coat is then covered with at least one coat of a more complex clay based plaster. Mixed with sand and finely chopped straw, this plaster allowed us to achieve an impressive flat coat of natural plaster. With the help of Rae Parkinson, we experimented with various mixes of clay sand and straw, and learned how to achieve a quality inside finish. By the time all left, tired and muddy on Sunday evening, all of the outside walls were coated in a fine coat of clay’slip’ and we had done slip and intermediate plaster layers on the inside of the south facing wall.
So now we have an indeterminate gap, to prepare for putting up the first floor walls. In the meantime, thank you to Emma, Barbara and Rae for their hard work and endless advice. Also, thanks to Sylvan, Kate, Salli, Julianne, Sue, Pete, Guy, Jan, Alice, Jude, Matt, Jeffry, Harvey, Rueben, Wendy, Rachel, Sara, Syb, James, Alex, Verena, Enda, Lillian for all you hard work and fun. Special thanks must also go to my parents, Tony & Pam for the food (especially the cheese!) and to Chris and Ann for feeding us, heavy construction and giving Rose a wonderful three weeks while we ran around frantically and kept east Leicestershire builder’s merchants in business!

Excellent! Really great to see it taking shape. I have fond memories of mixing daub (for wattle and daub) – which includes quite a lot of poo. Clay plasters sound more pleasant!
Pingback: Finally, another post! April 2016 to February 2017 | The House of Lotti